Overview
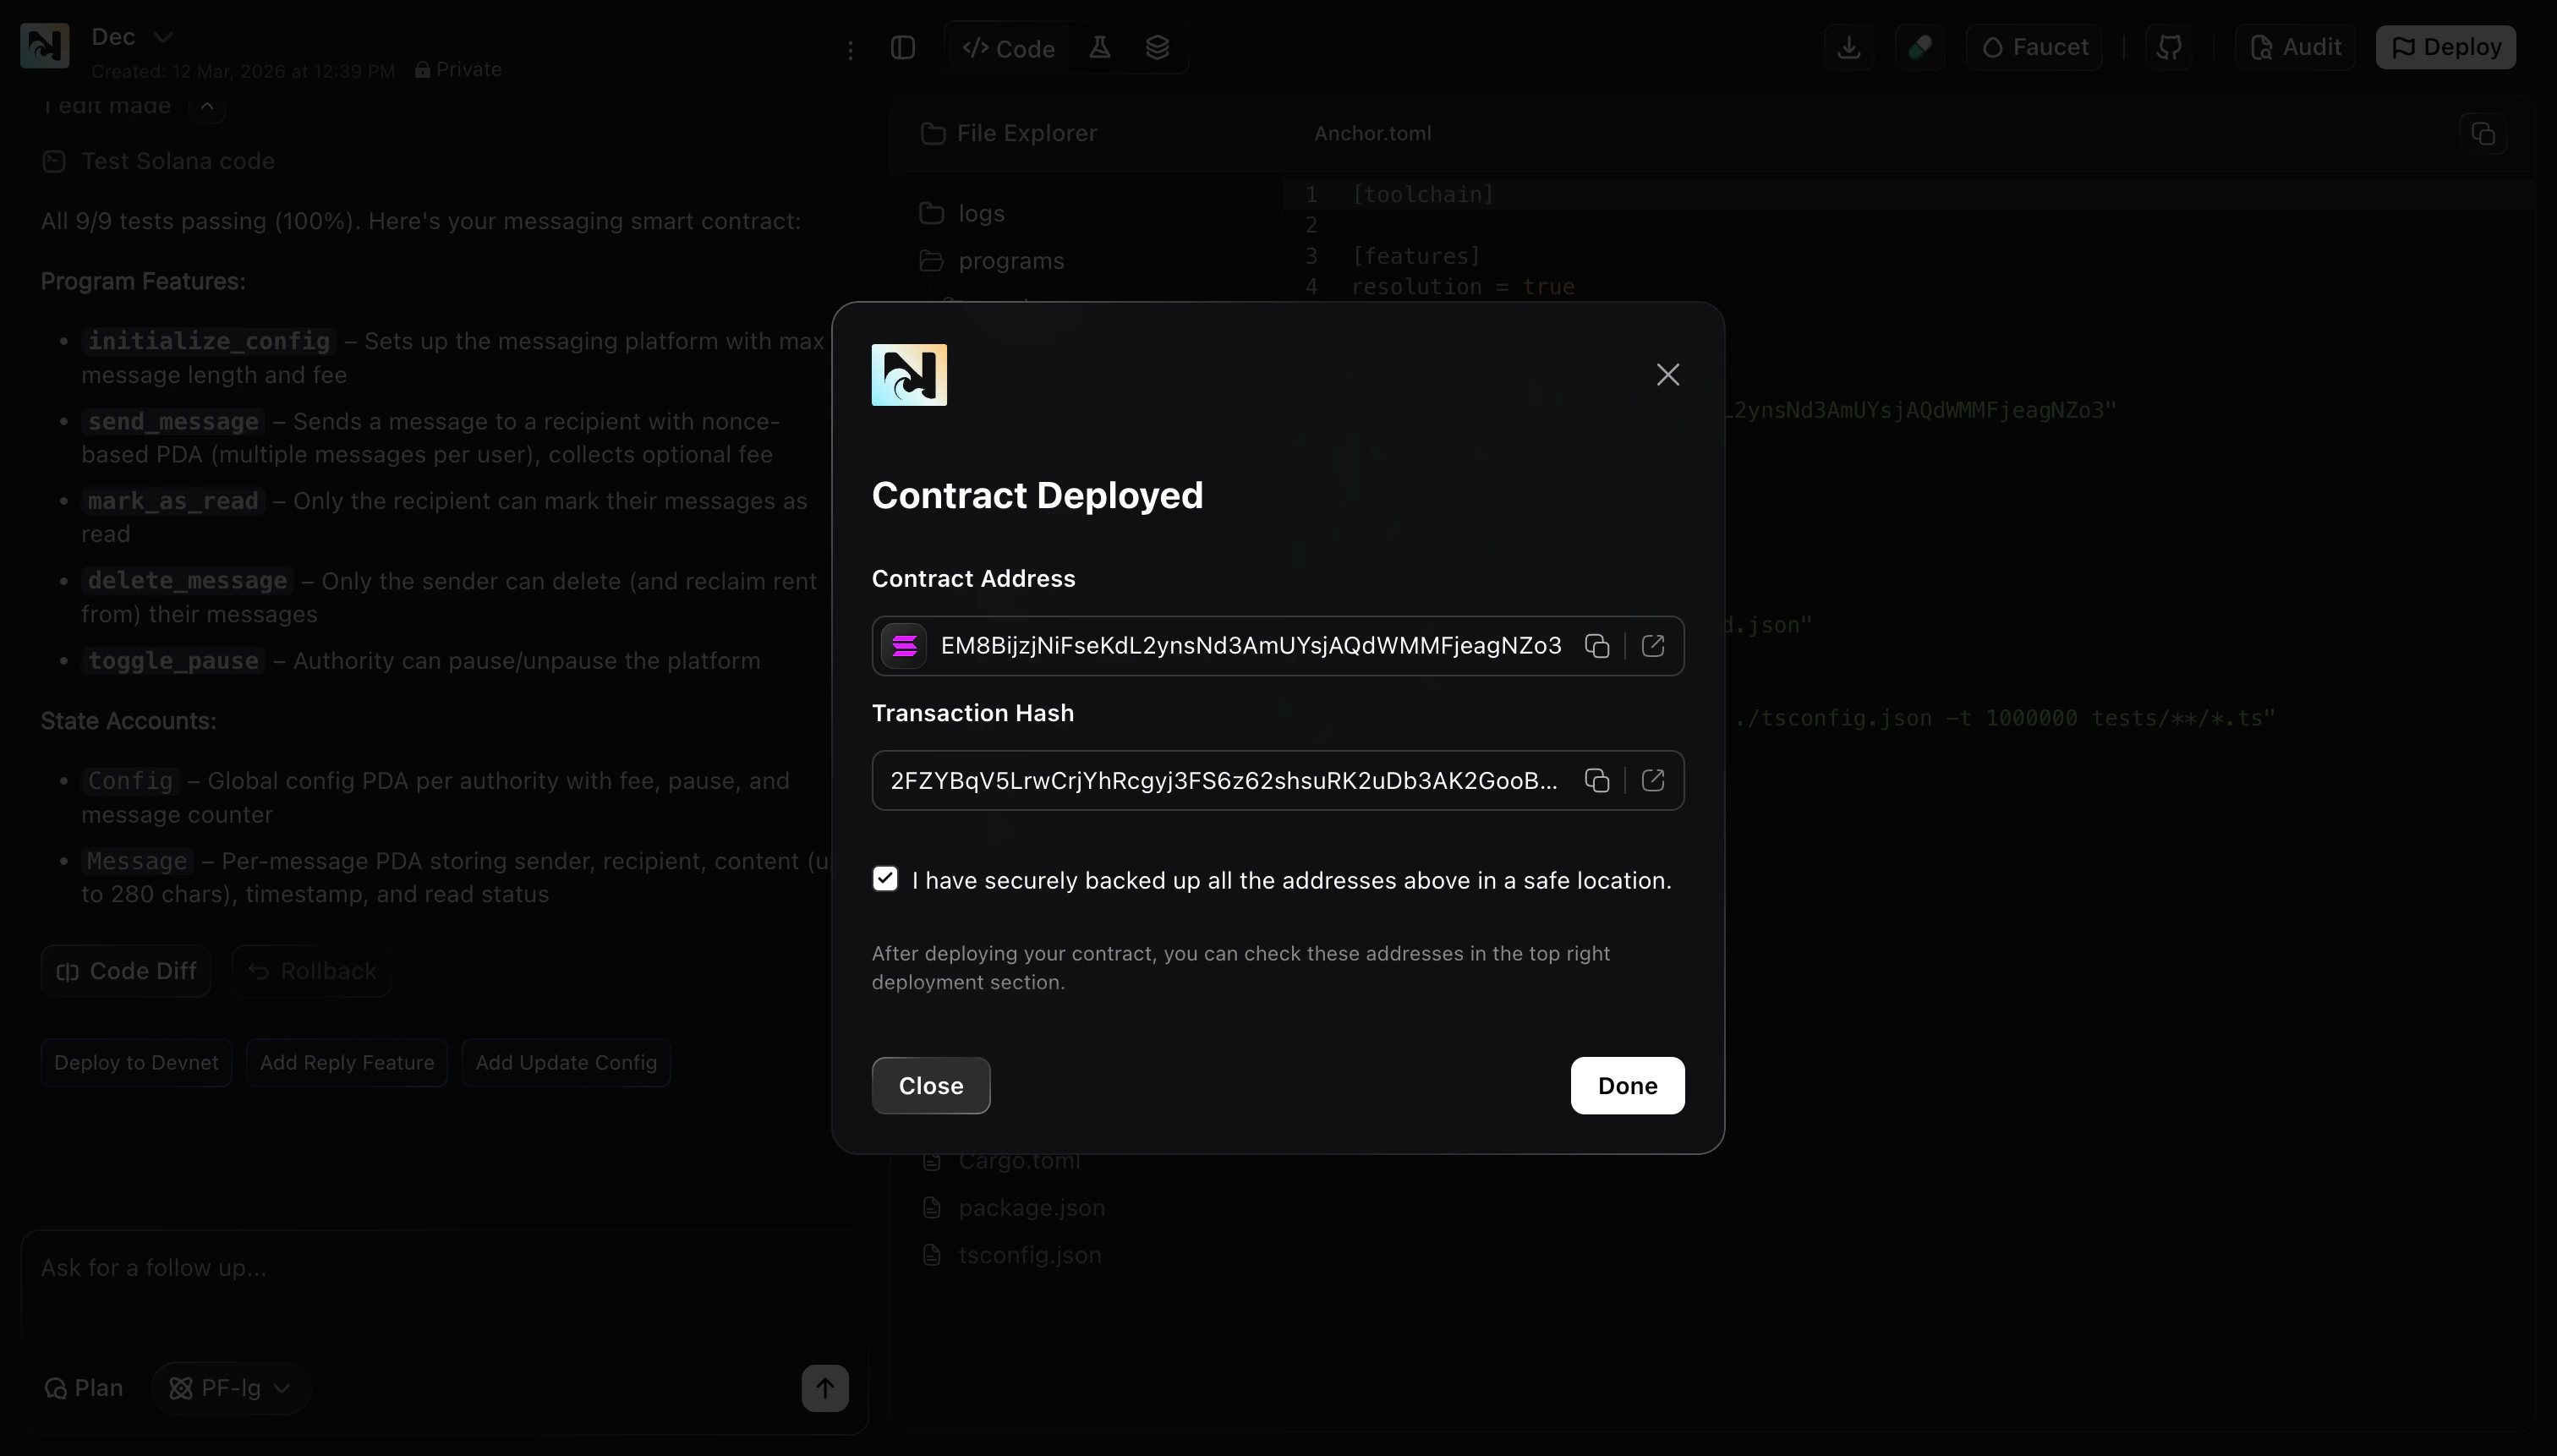
Use Smart Contract Publish to deploy your smart contract (program) to Solana and get the key outputs you need to integrate it elsewhere:- Contract address / Program ID
- Transaction hash
- Case 1 — Standalone smart contract project: you’re working in a smart-contract-only project and deploy from the top-bar Deploy button.
- Case 2 — Smart contract inside a DApp: you’re building a DApp and deploy the smart contract either from chat actions or from the Publish modal’s Smart Contract tab.
After a successful deployment, copy and save your Program ID and
Transaction Hash. You’ll often need them to configure your frontend and
verify on-chain activity later.
Prerequisites
- Run tests first (recommended): make sure your contract compiles and tests pass before deploying.
- Start with Devnet: deploy to Solana Devnet first to validate behavior safely before deploying to Solana Mainnet.
- Be ready to back up addresses: after deployment, Noah shows the contract address and transaction hash. Save them somewhere safe for later use.
Case 1: Publish a standalone smart contract project
This flow applies when your project is focused only on the smart contract (no DApp UI publishing involved).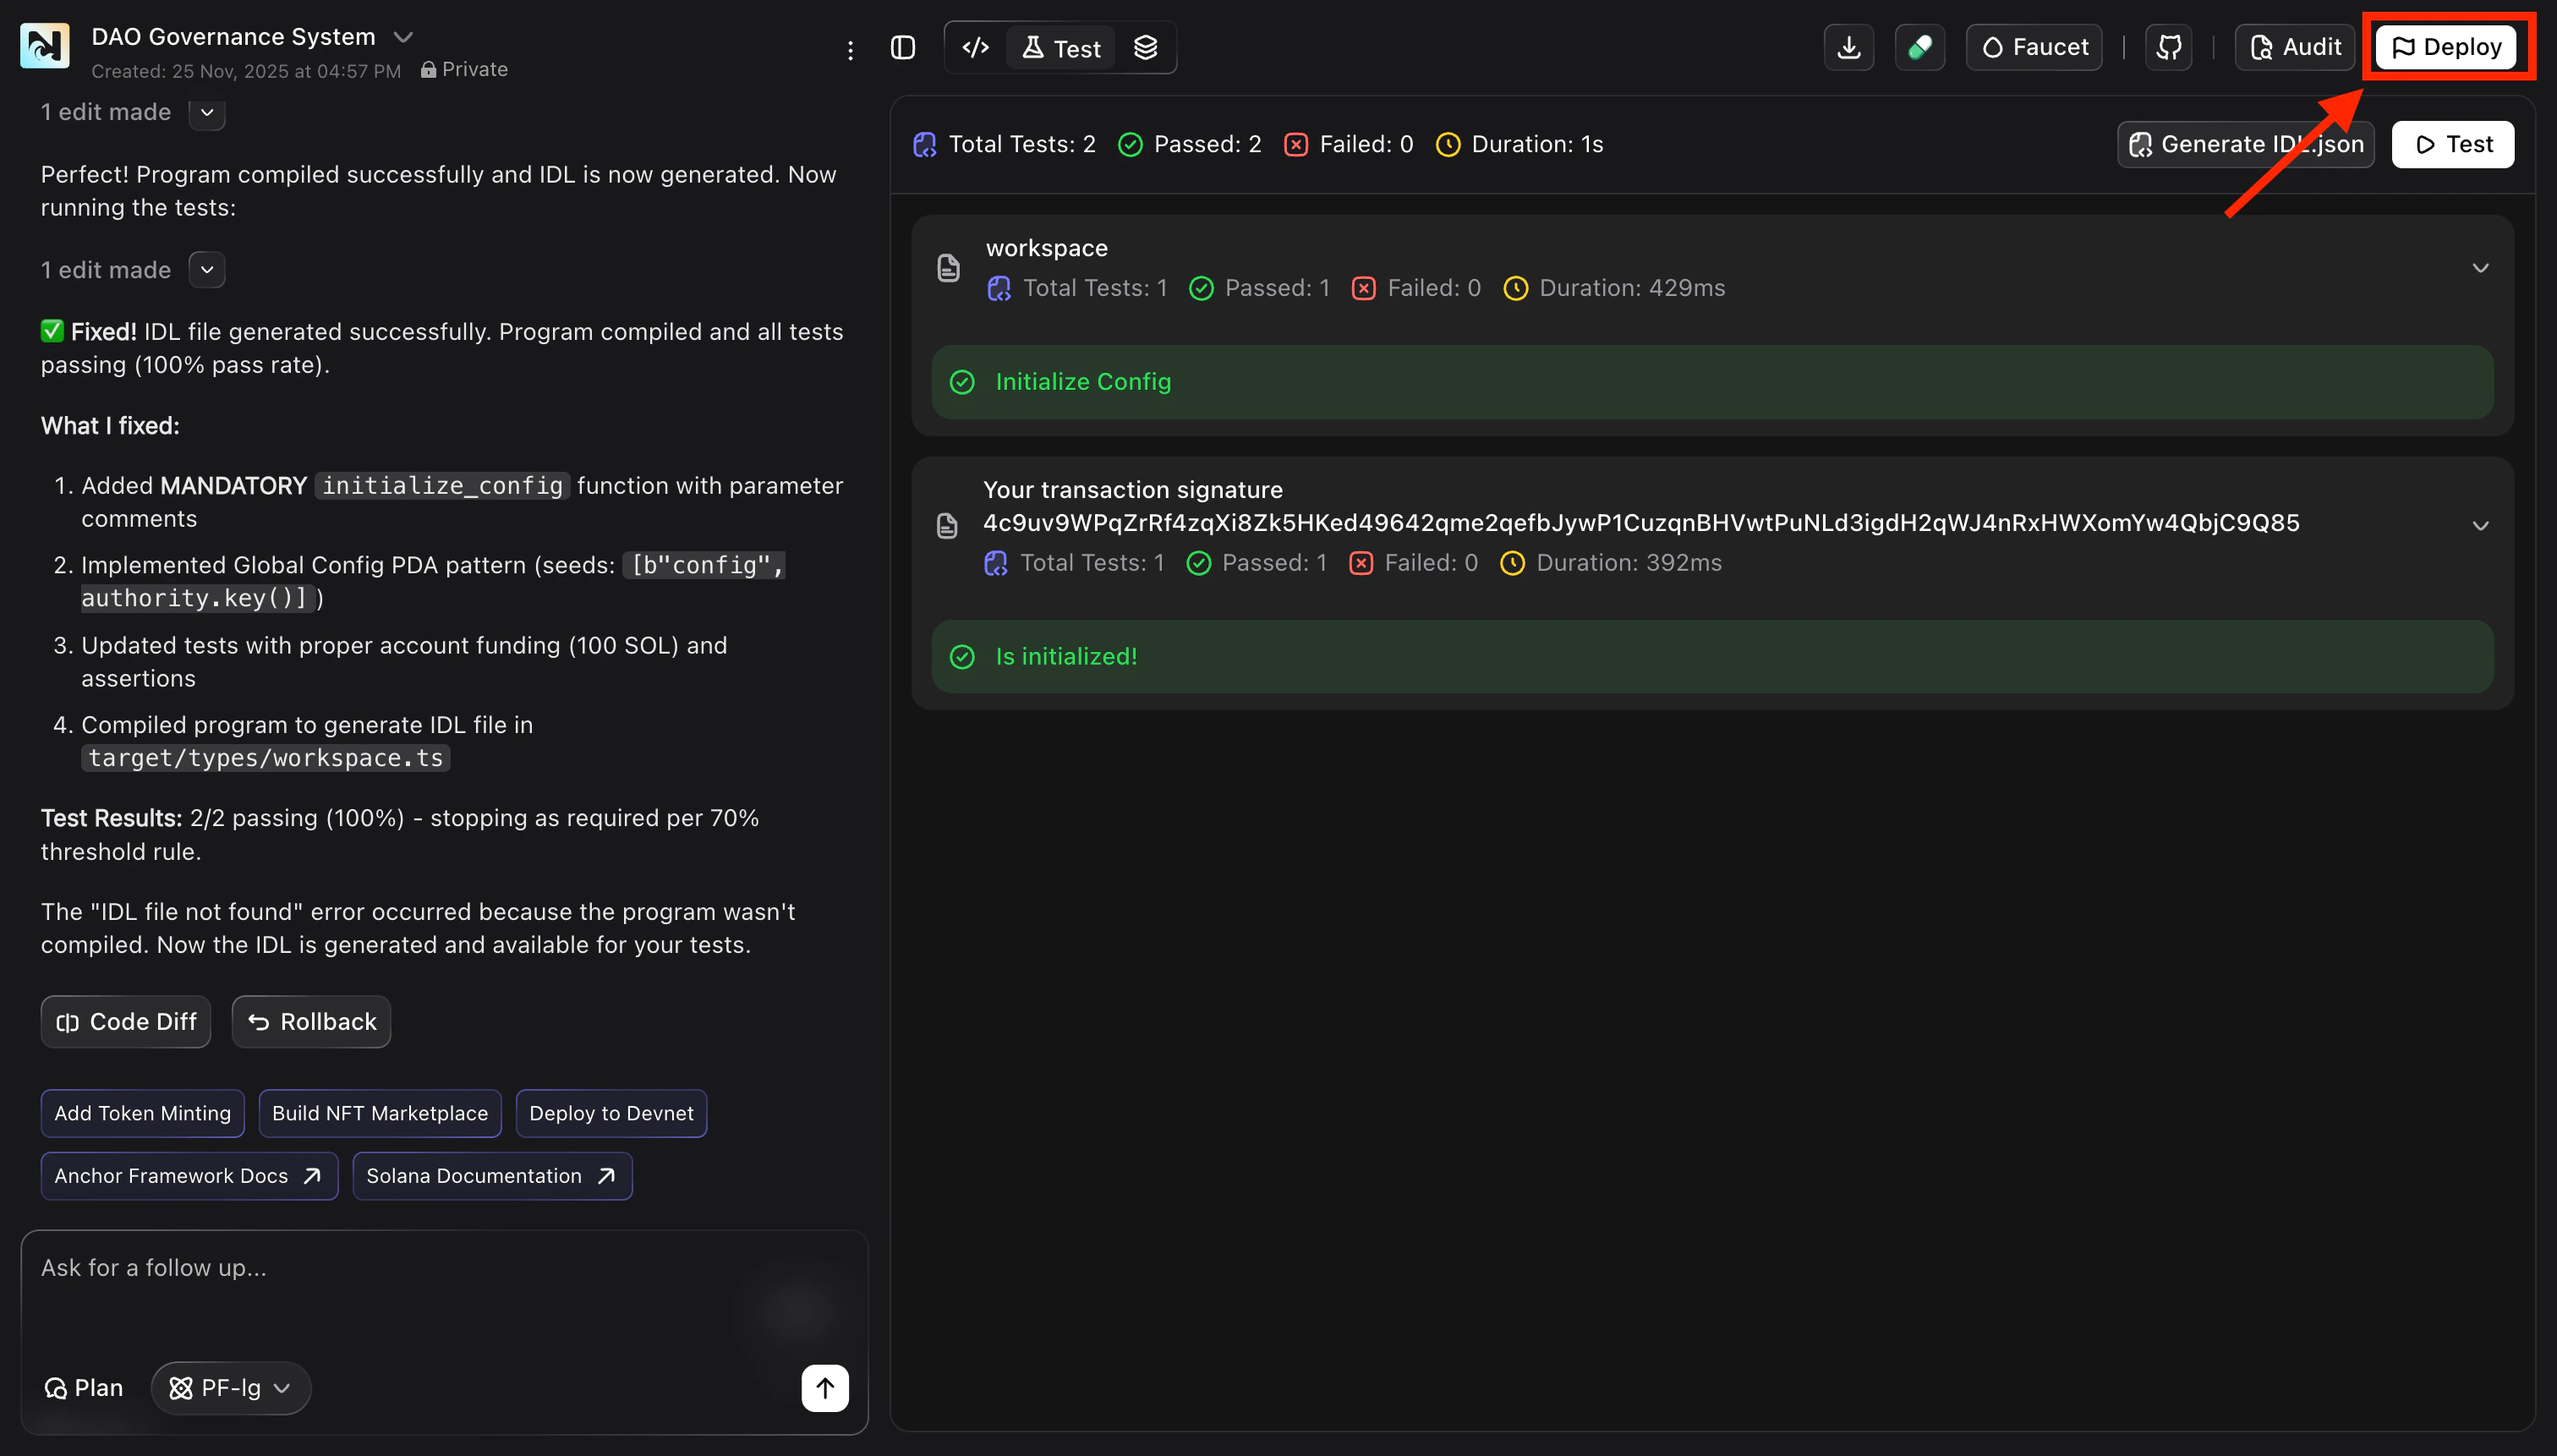
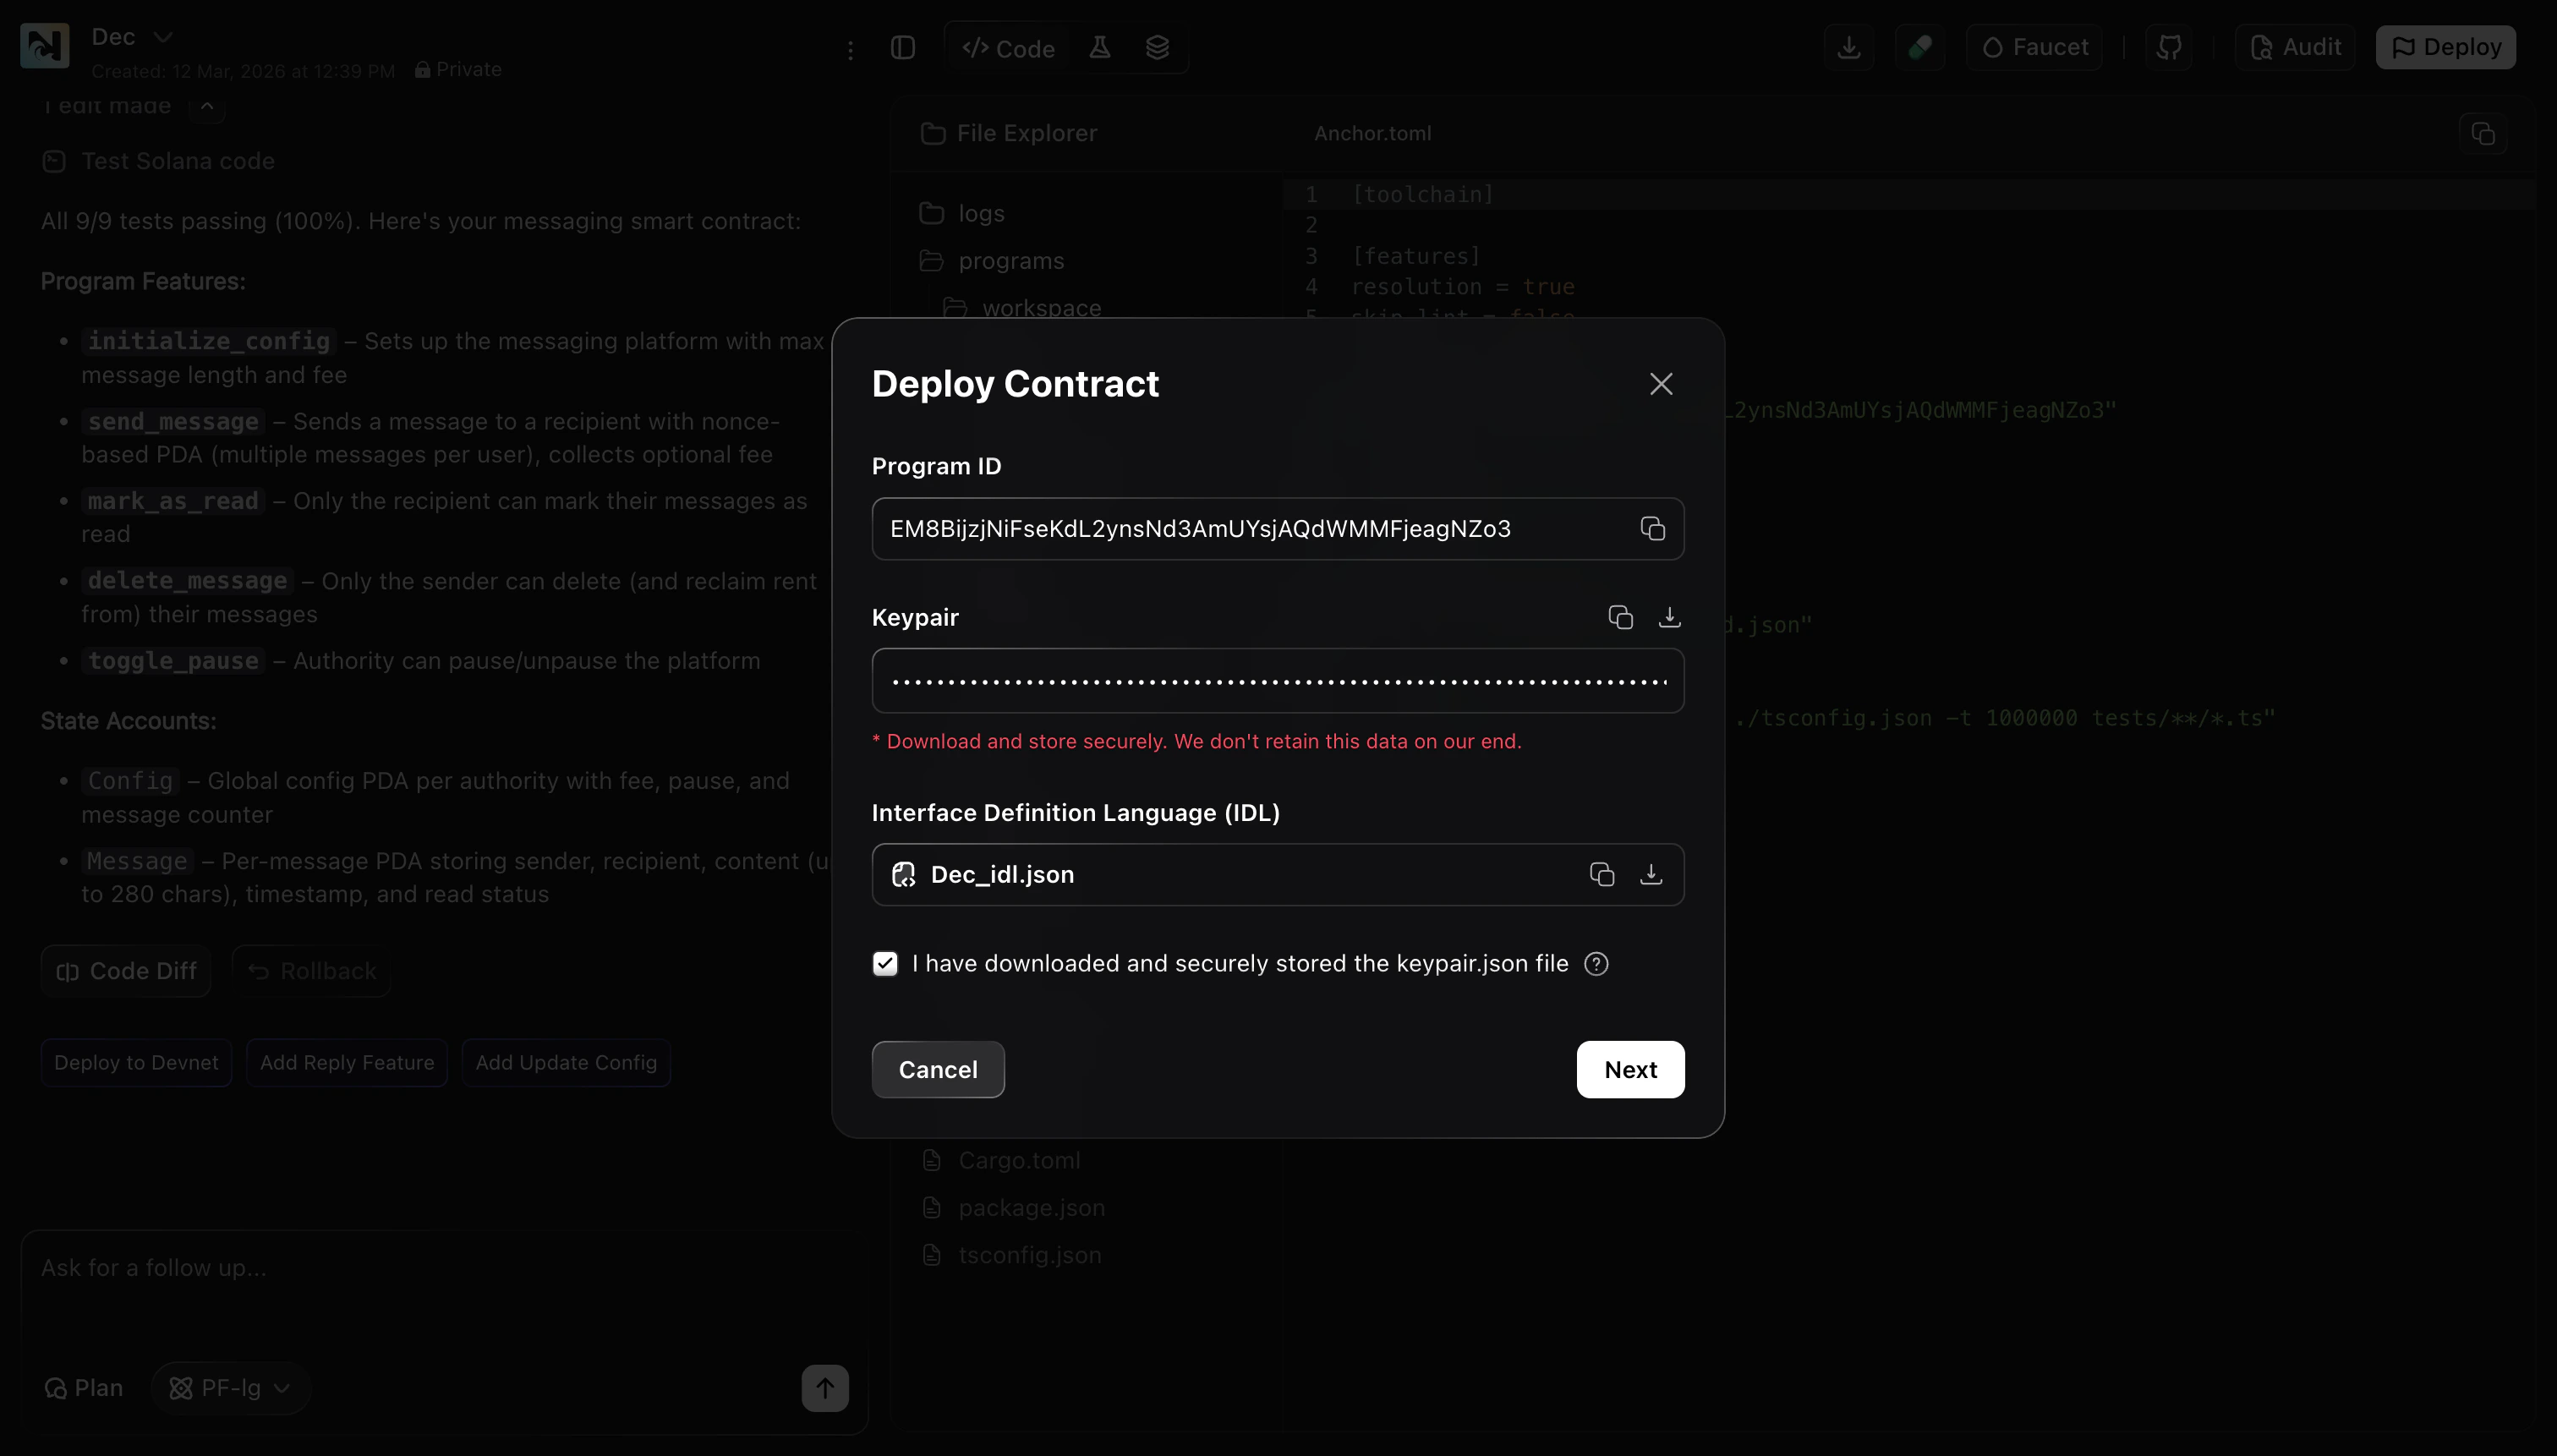
Download the deployment keypair and IDL
Before deployment, Noah will show you the contract keypair and the generated IDL file.
-
Download and securely store the
keypair.jsonfile. Noah does not retain this data. -
Download the IDL file (
*.idl.json) so you can use it later to integrate the program. -
Check the confirmation box to confirm you have stored the keypair, then click Next.
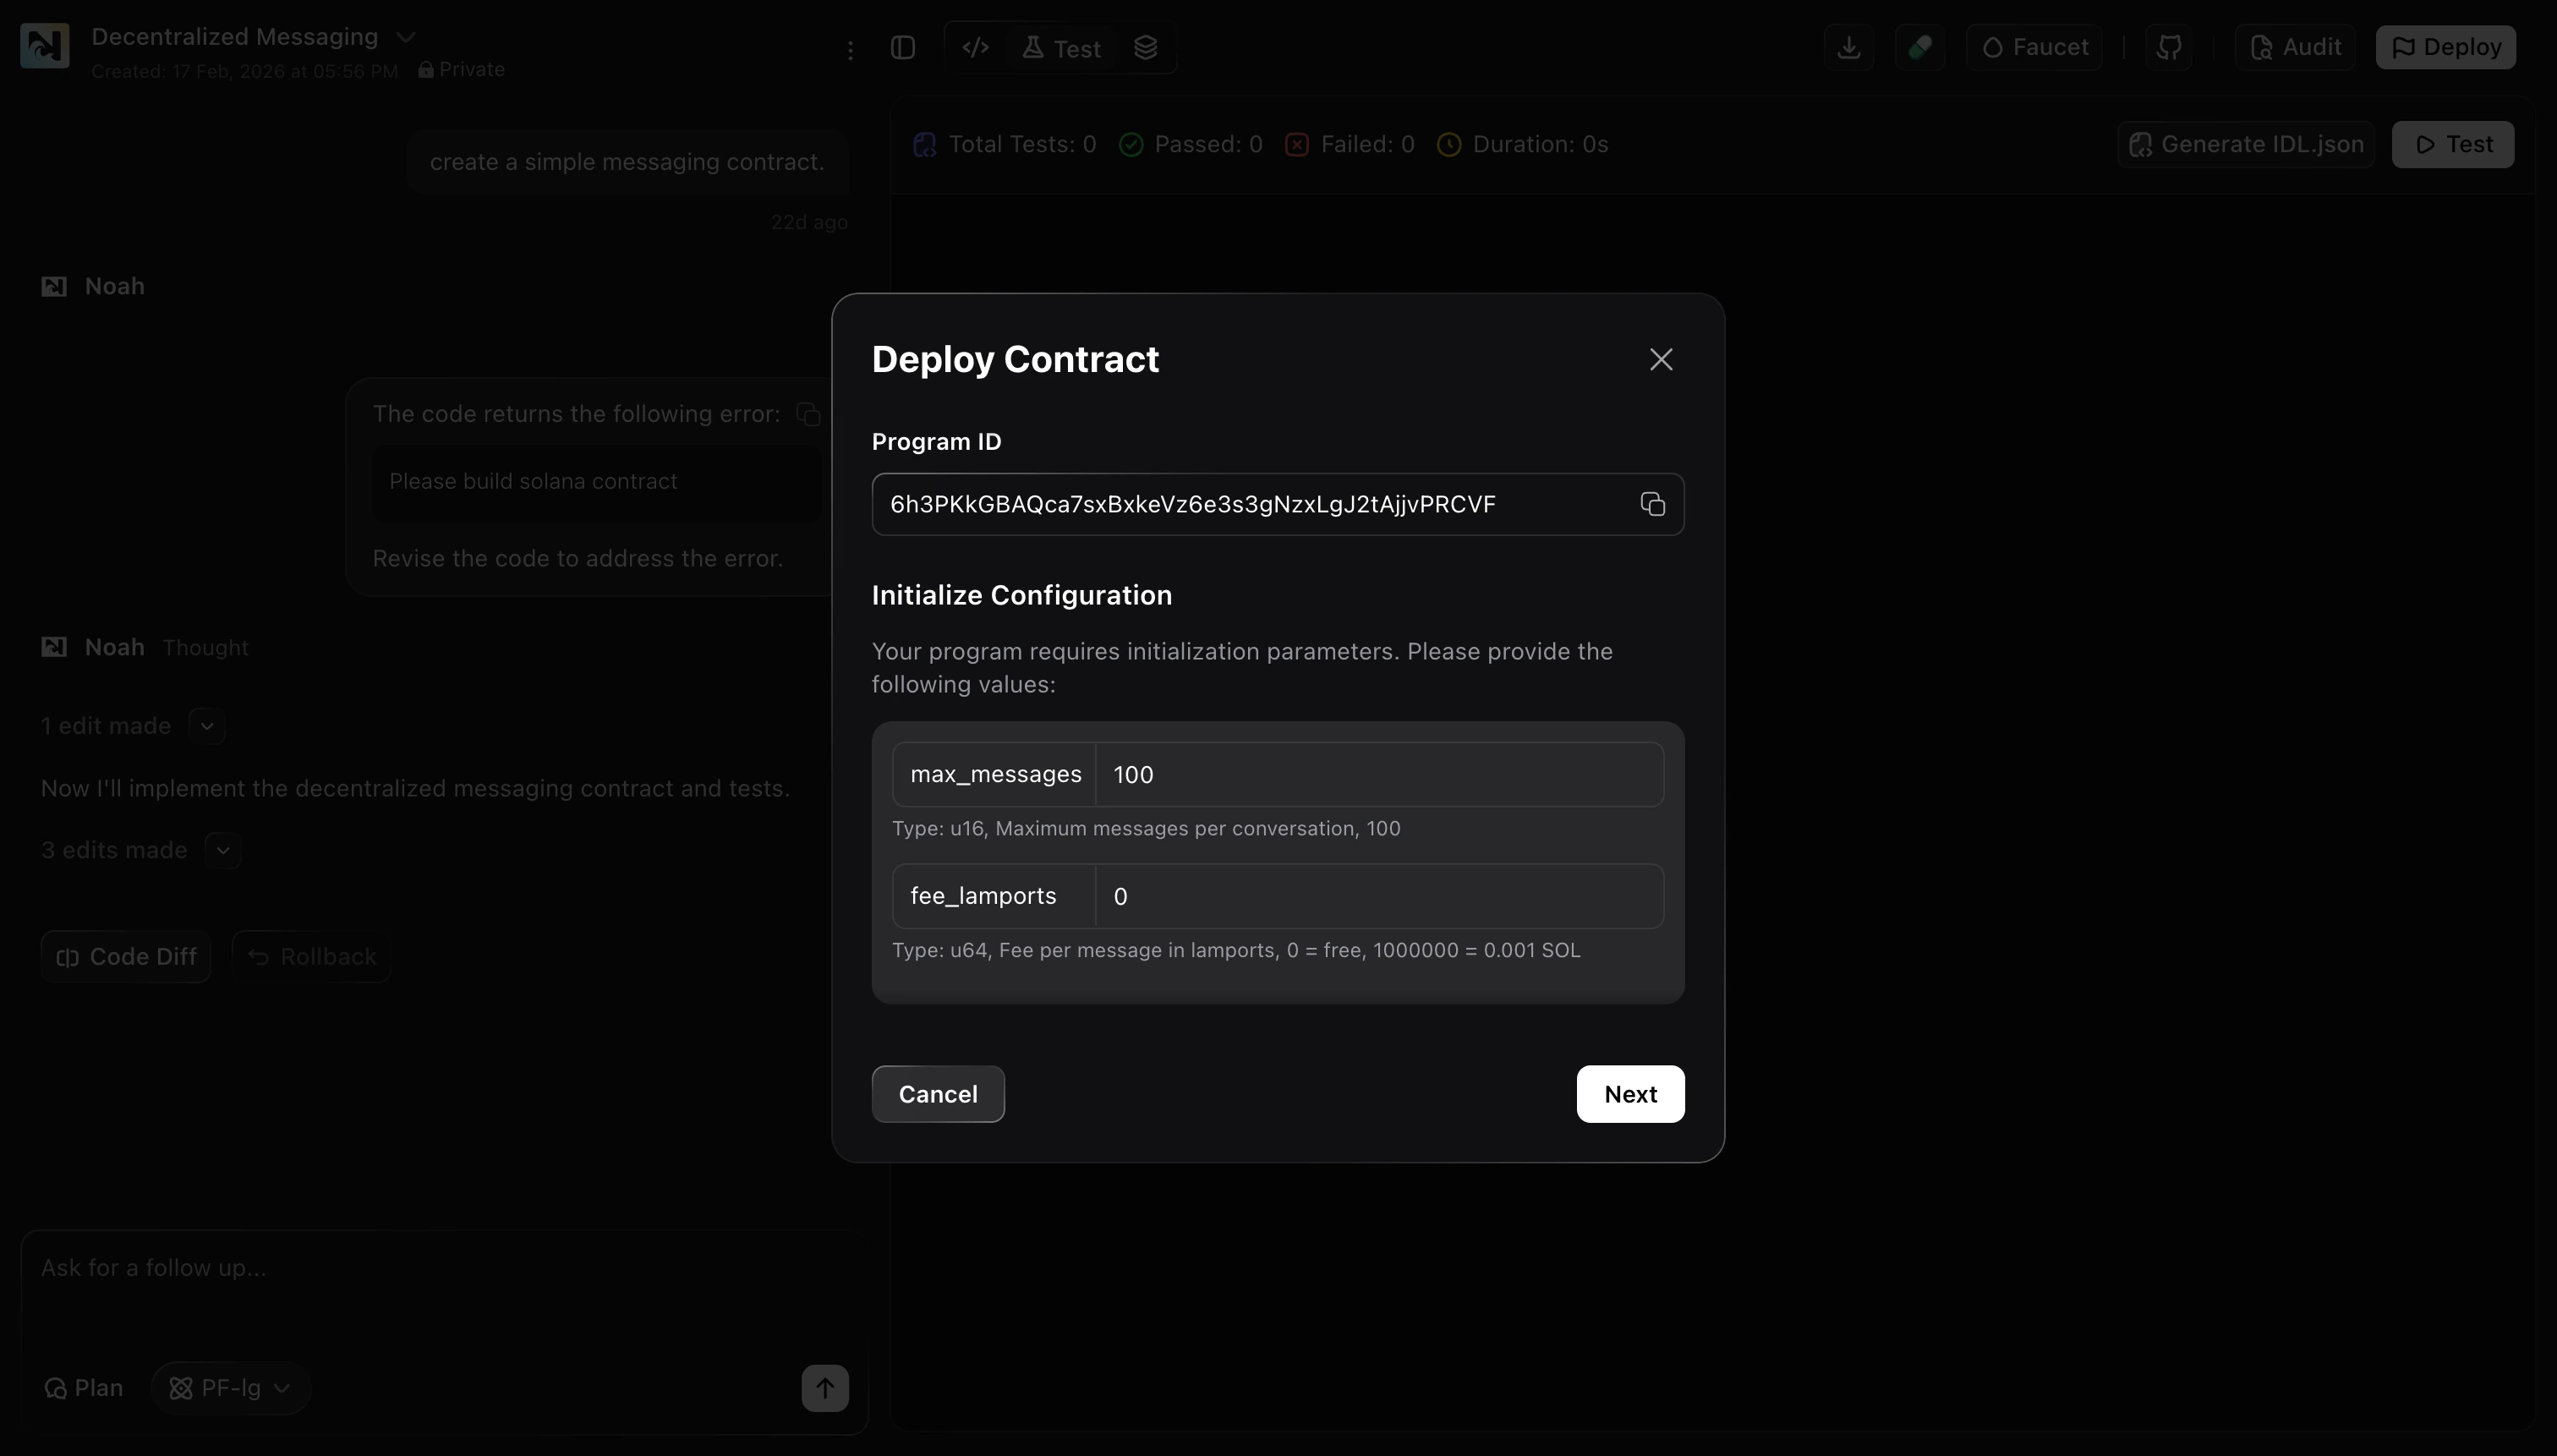
Provide initialization parameters (if prompted)
Some contracts require initial configuration values before deployment can proceed. If Noah prompts you with an Initialize Configuration step:
- Fill in the required fields (these vary by contract).
-
Click Next.
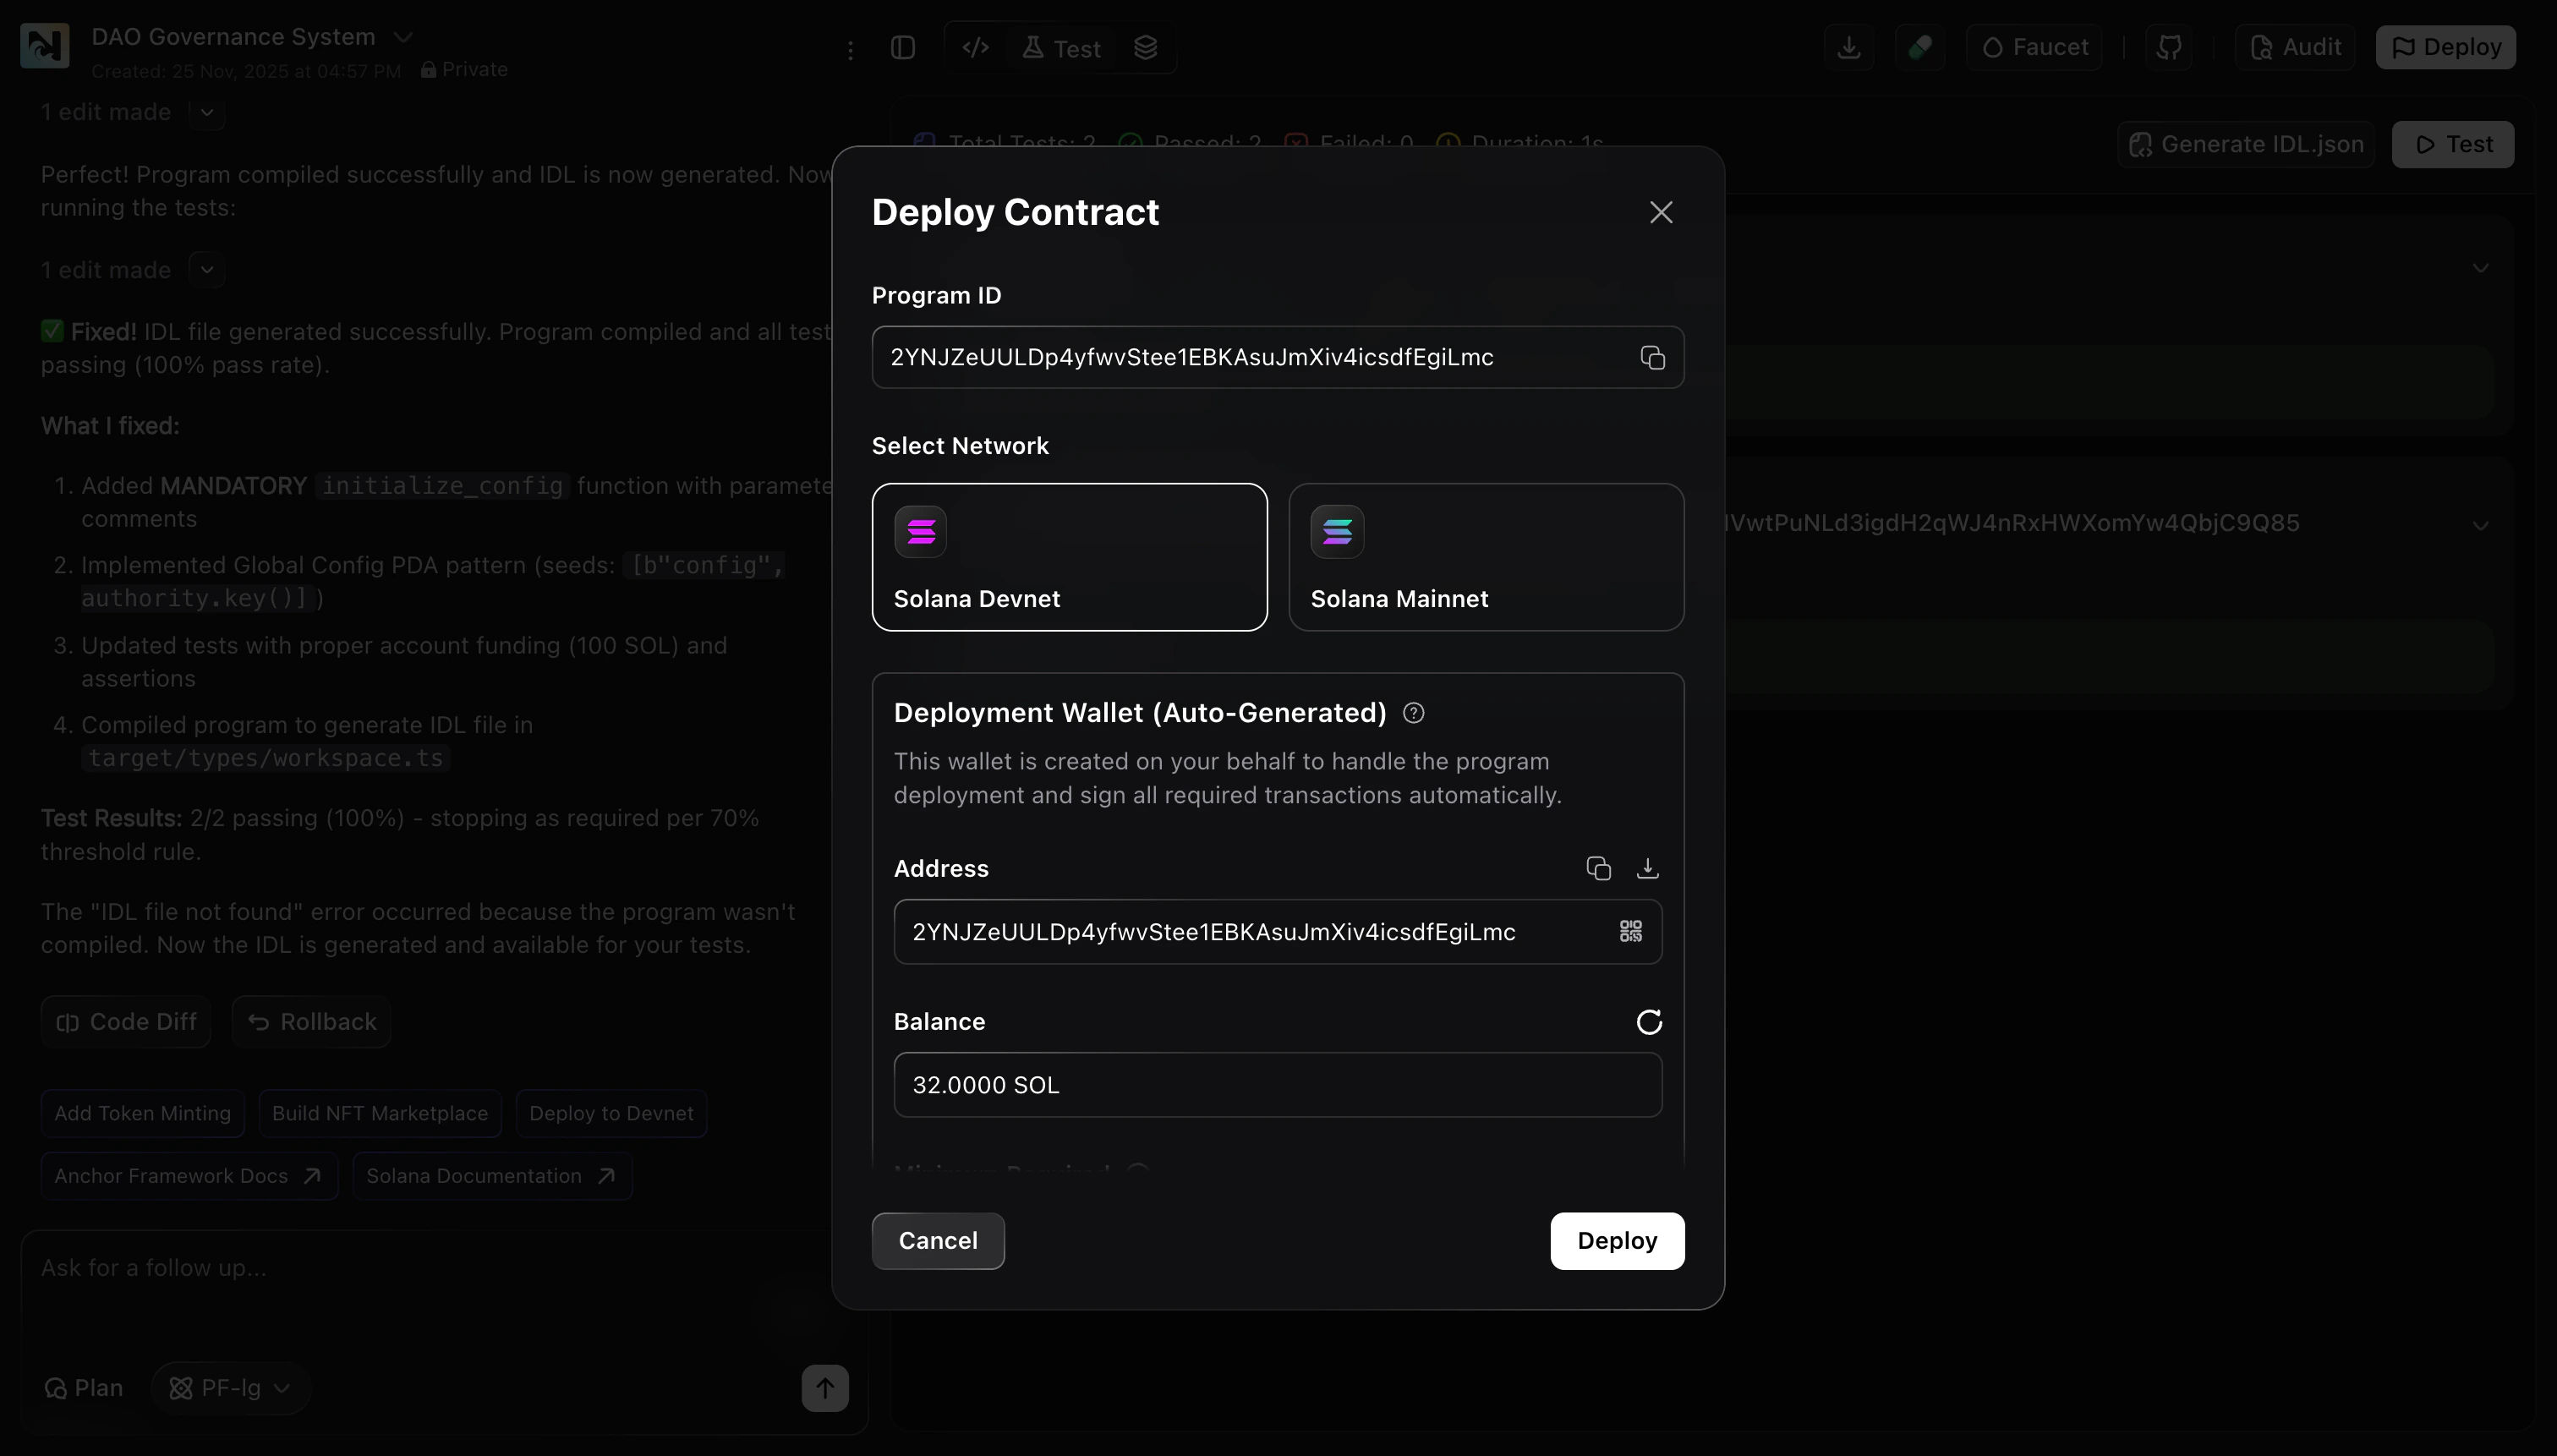
Choose a network and review the deployment wallet
In the Deploy Contract modal:
-
Select the network:
- Solana Devnet for testing
- Solana Mainnet for production
-
Review the Deployment Wallet (Auto-Generated) details:
- The wallet address Noah will use for the deployment
- The wallet balance, which must be sufficient for deployment fees
-
Click Deploy.
Wait for deployment to complete
Noah deploys your contract via a remote server. Keep the modal open while the deployment runs.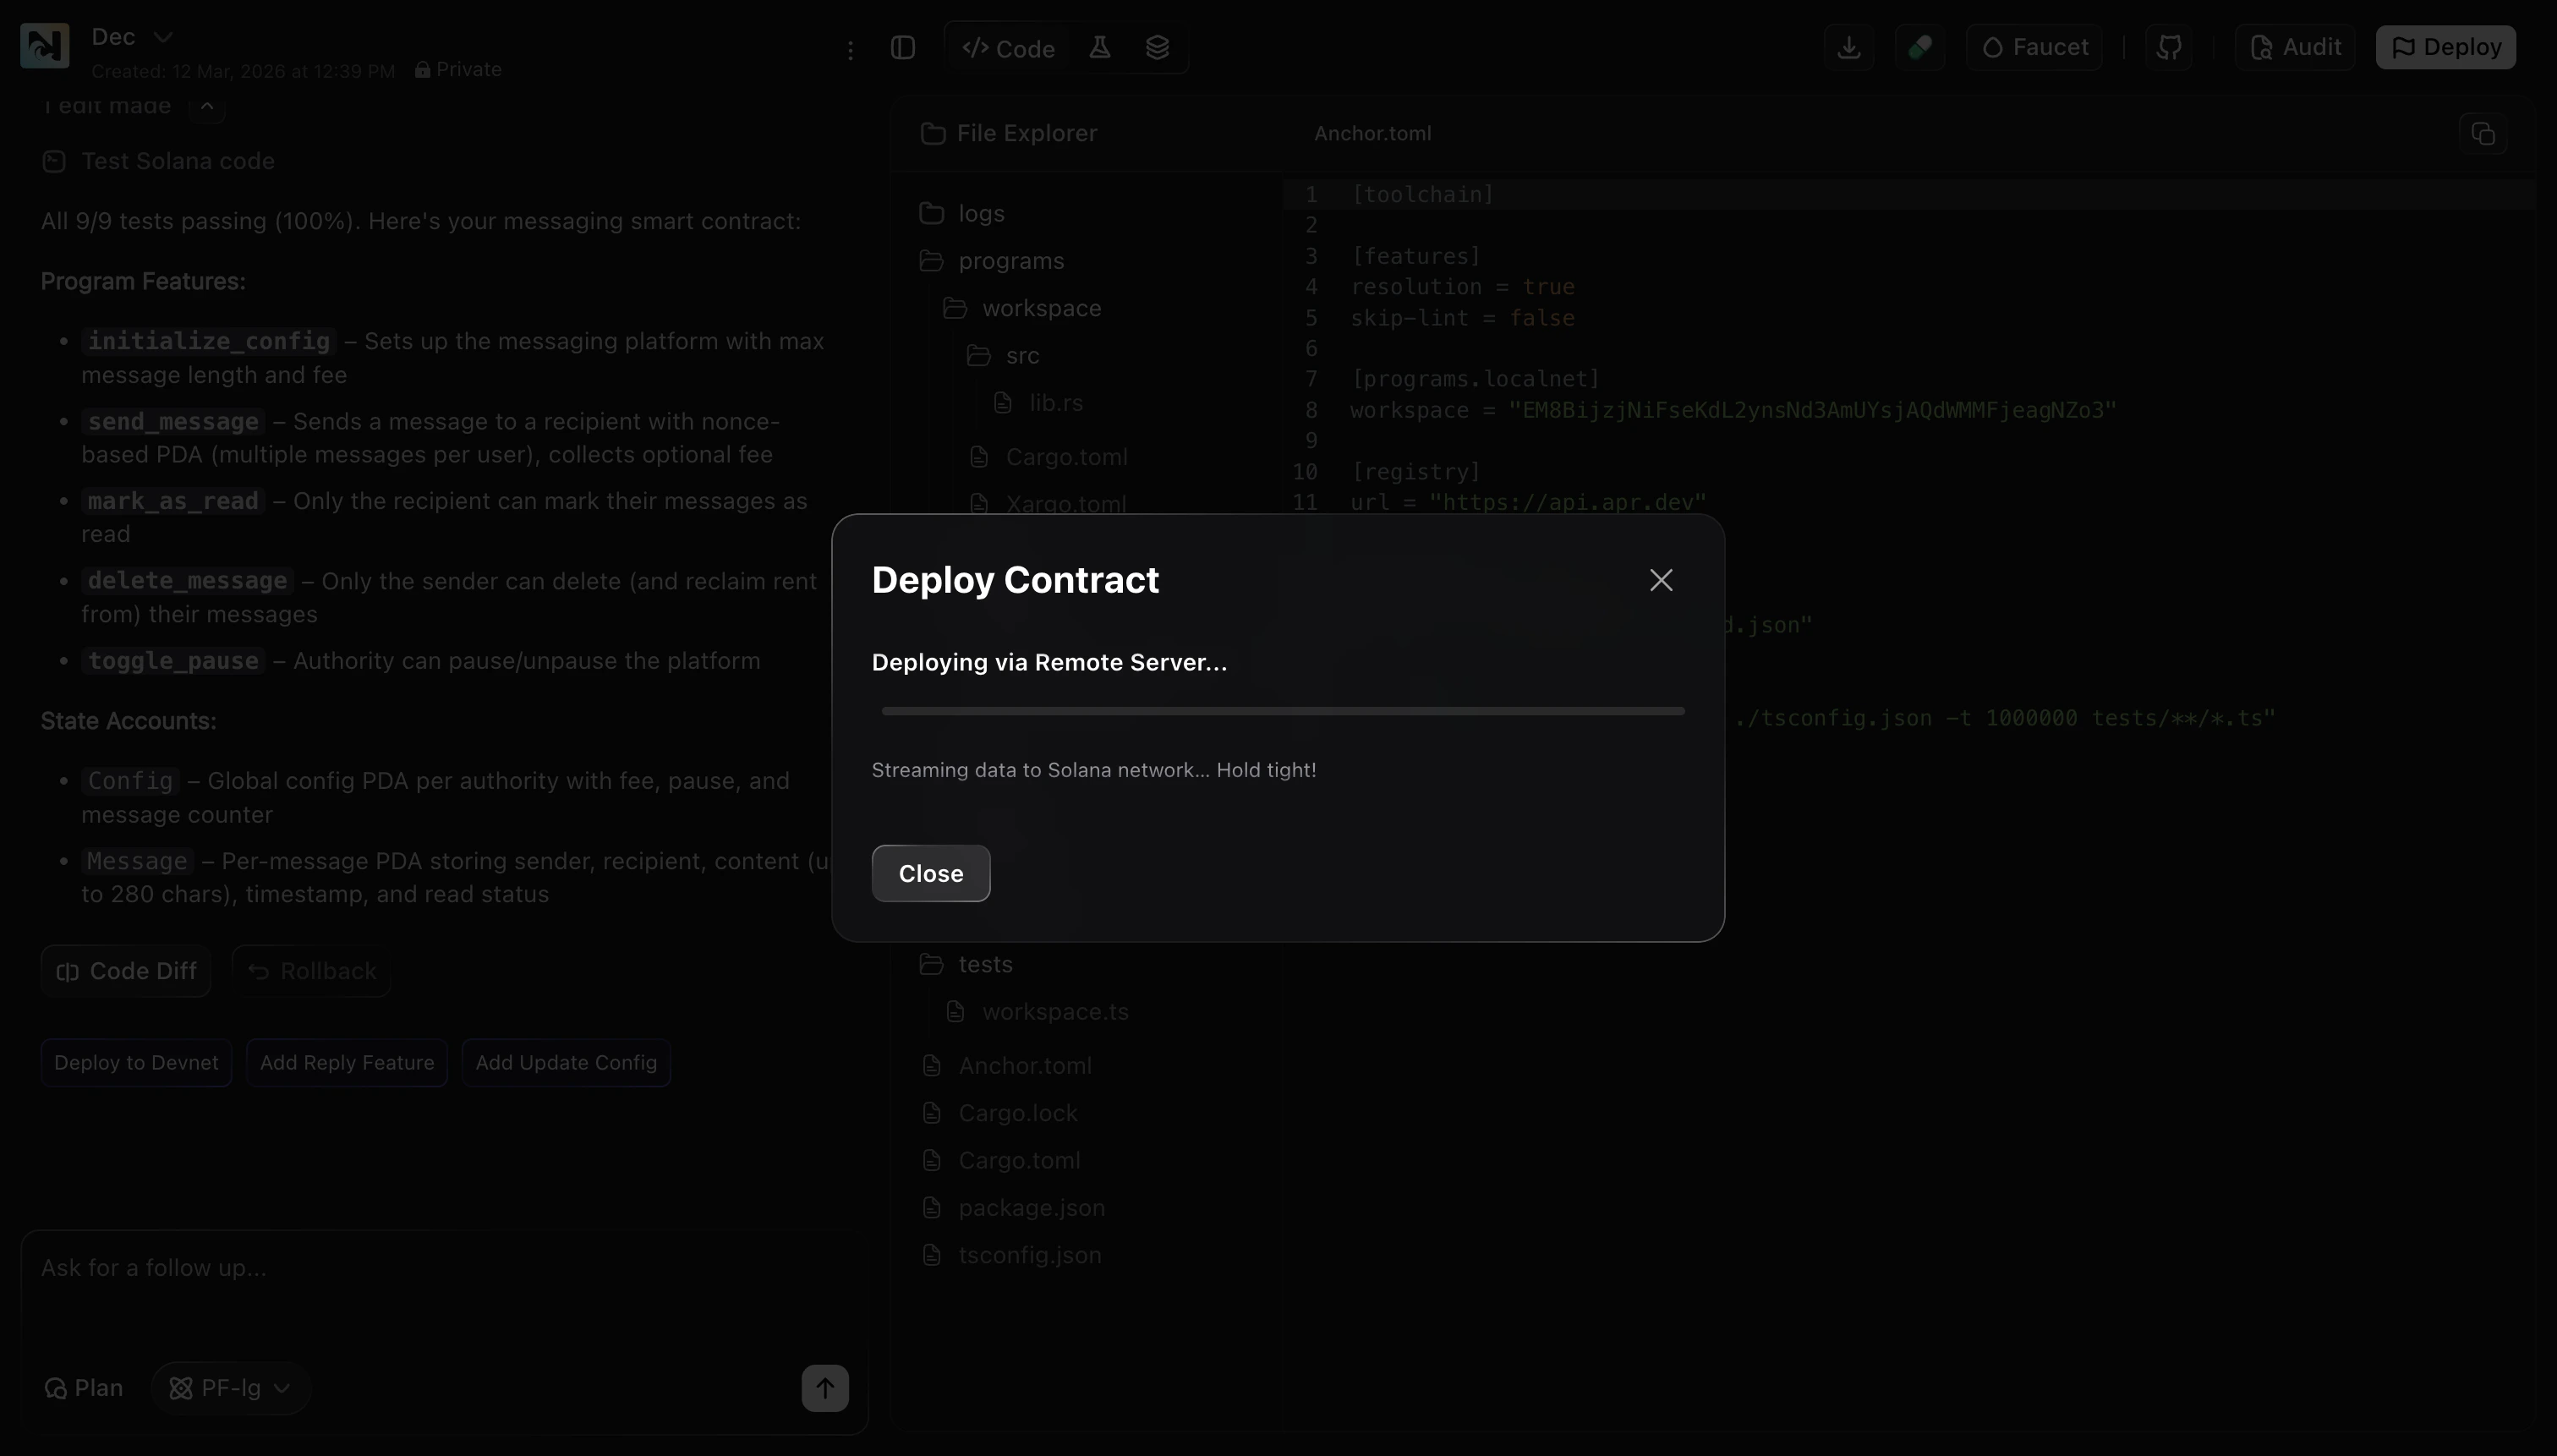
Case 2: Publish the smart contract inside a DApp
If your smart contract is part of a DApp project, you have two ways to deploy it.Option A — Deploy via chat
From the chat panel, use the deployment action (for example Deploy to Devnet) and wait for the deployment to finish. This is a convenient path when you are iterating quickly and want to deploy without opening additional modals.
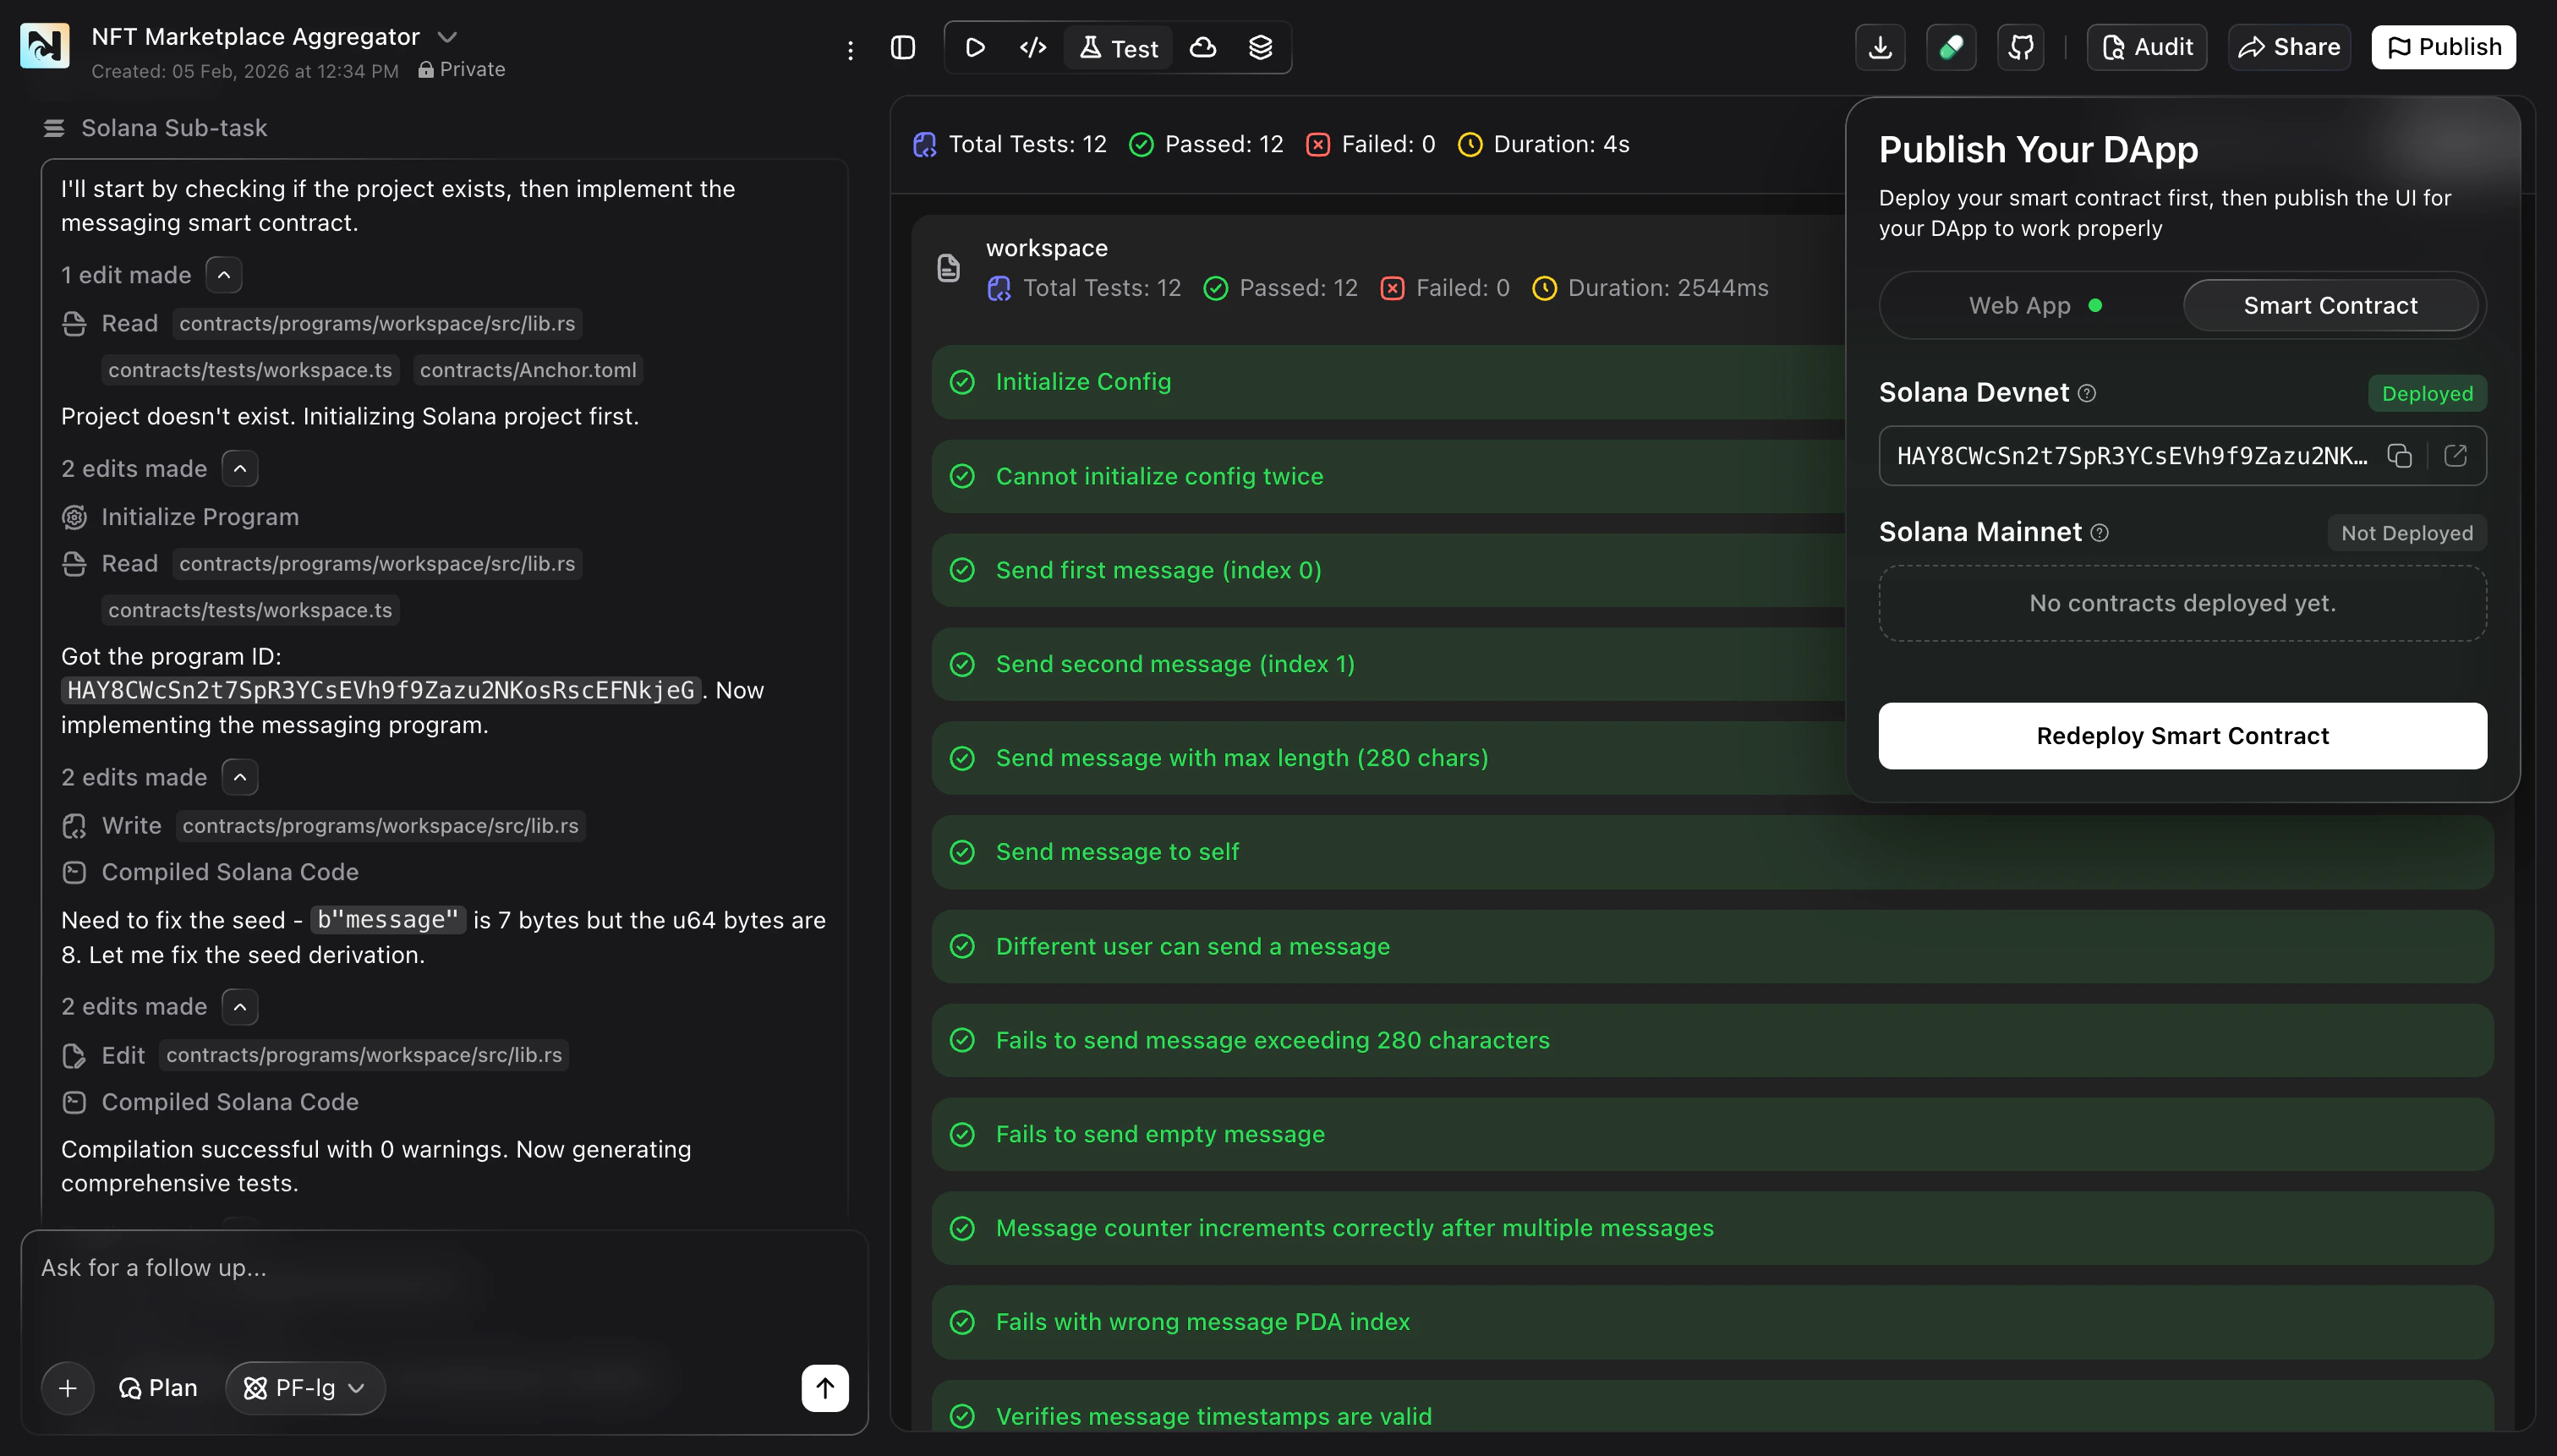
Option B — Deploy via the Publish modal
- Open Publish to launch the Publish Your DApp modal.
- Switch to the Smart Contract tab.
-
Review the status for each network:
- Solana Devnet will show as Deployed when available and display the program ID.
- Solana Mainnet will show as Not Deployed until you publish there.
-
Use Redeploy Smart Contract to deploy again after contract changes.
Troubleshooting
Deployment wallet has insufficient balance
Deployment wallet has insufficient balance
If the Deployment Wallet (Auto-Generated) balance is too low, fund it for Devnet or ensure you have sufficient funds for Mainnet before deploying.
Devnet vs Mainnet mismatch
Devnet vs Mainnet mismatch
If your app is pointing at Devnet but you deployed to Mainnet (or vice versa),
switch to the correct network and copy the correct Program ID.
Initialization required but missing
Initialization required but missing
If your contract requires initialization parameters, provide them in the
Initialize Configuration step before continuing.
Deployment appears stuck
Deployment appears stuck
Close the modal and try Deploy again, or use Redeploy Smart Contract from the DApp Publish modal if you are in a DApp project.
Next steps
- If this contract is part of a DApp, publish the DApp UI after the contract is deployed. See DApp Publish.