Get Started
All you need is one prompt. Make sure Supabase is connected to your project, then ask Noah to add authentication. Noah will automatically:- Enable the Web3 Wallet provider in your Supabase project
- Generate a wallet service for creating and managing Solana keypairs
- Add a Connect button to your app’s UI
- Set up the full sign-in flow with message signing and session management
- Handle auth state changes so the UI updates when users connect or disconnect
How It Works
- The user clicks Connect in your app
- Noah generates or retrieves a Solana wallet for the user
- A sign-in message is created and signed with the wallet’s private key
- The signature is verified by Supabase using
signInWithWeb3 - The user is authenticated and a session is created
Noah uses Supabase’s
signInWithWeb3 method with the solana chain. This is different from traditional email/password or social login — it is a cryptographic, wallet-based authentication flow.Web3 Wallet Provider
When you ask Noah to add Supabase auth, the Web3 Wallet provider is automatically enabled in your Supabase project — no manual configuration needed.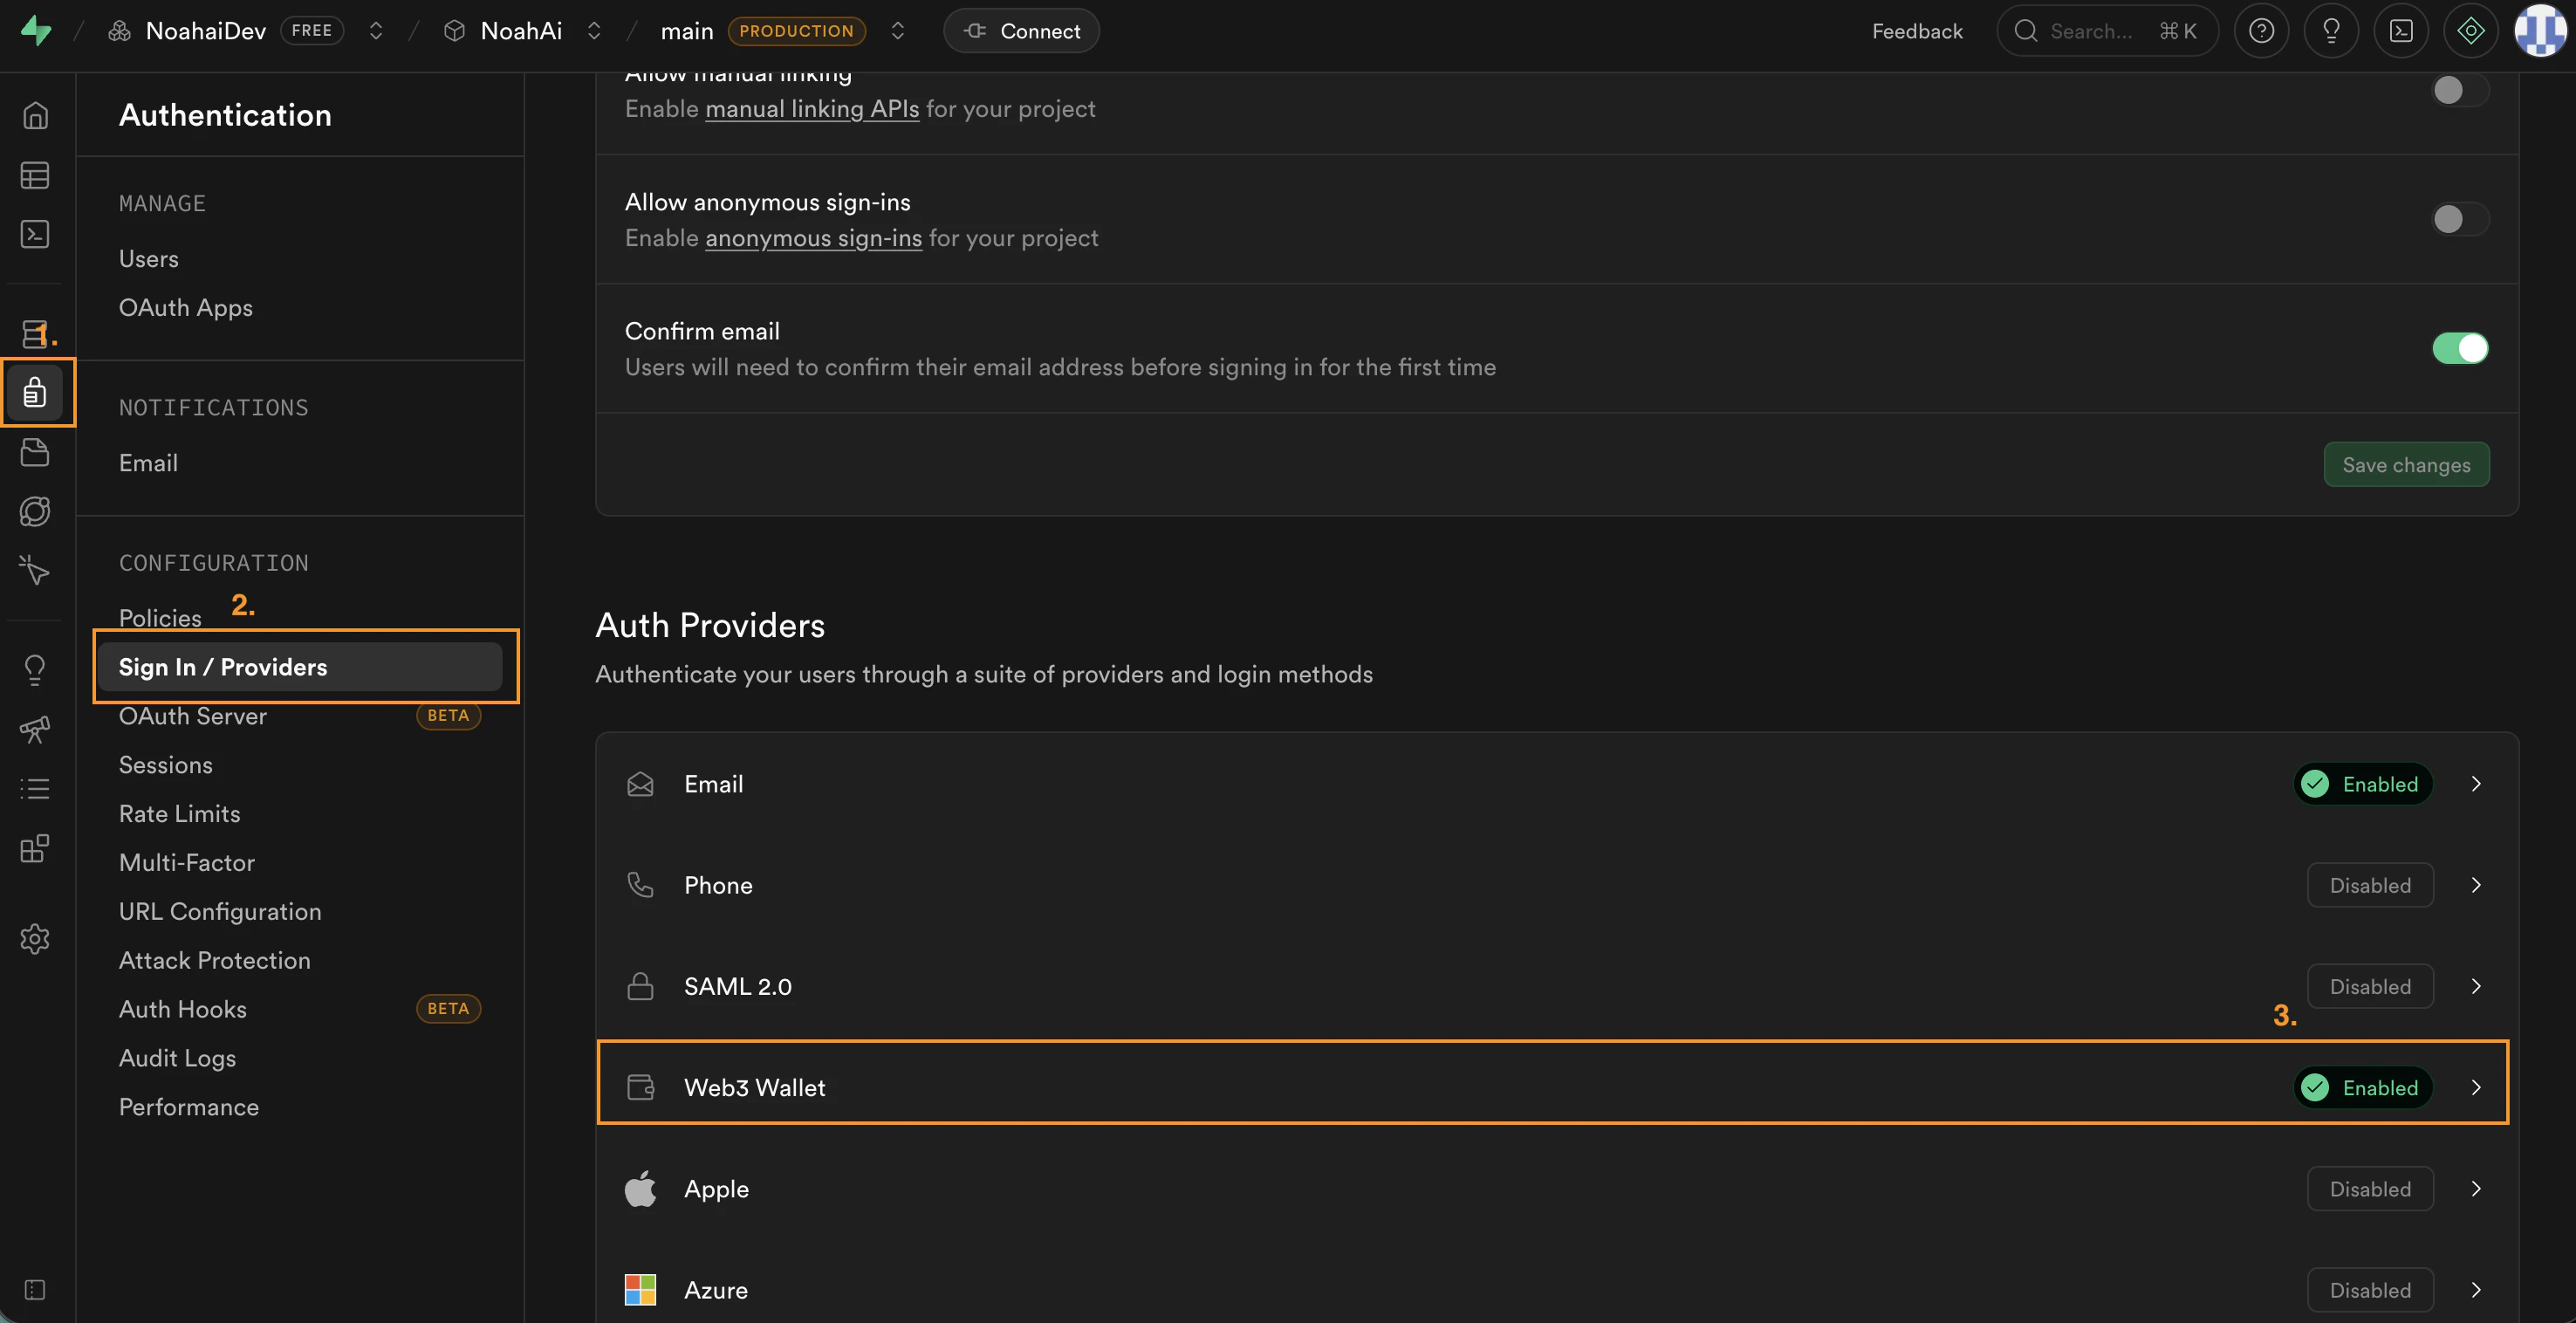
What Noah Generates
When you prompt Noah to add Supabase auth, it creates the following:Wallet Service
Generates or retrieves a Solana keypair for the user. Handles wallet creation, storage, and message signing.
Connect Button
A UI component that lets users connect their wallet, view their address, copy it, and disconnect.
Auth State Listener
Listens for authentication state changes using
supabase.auth.onAuthStateChange and updates the UI accordingly.Sign-In Flow
Constructs a structured sign-in message, signs it with the wallet, and calls
supabase.auth.signInWithWeb3 to authenticate.Example Prompts
Once authentication is set up, use these prompts to customize the experience:Customize the connect button
Customize the connect button
Add a user profile page
Add a user profile page
Restrict access to a page
Restrict access to a page
Troubleshooting
Connect button does nothing
Connect button does nothing
User is signed out after refreshing
User is signed out after refreshing
The session is lost when the page reloads.
- Ask Noah: “The auth session is not persisting after refresh, fix it”
- Make sure your app is connected to the correct Supabase project
Auth is not working after publishing
Auth is not working after publishing
Authentication works in preview but breaks on the published app.
- Check that your redirect URLs are configured correctly in Supabase
- If using a custom domain, add it to Supabase’s URL Configuration