Step 1: Open OpenClaw
From the Noah homepage, click Try OpenClaw to get started.
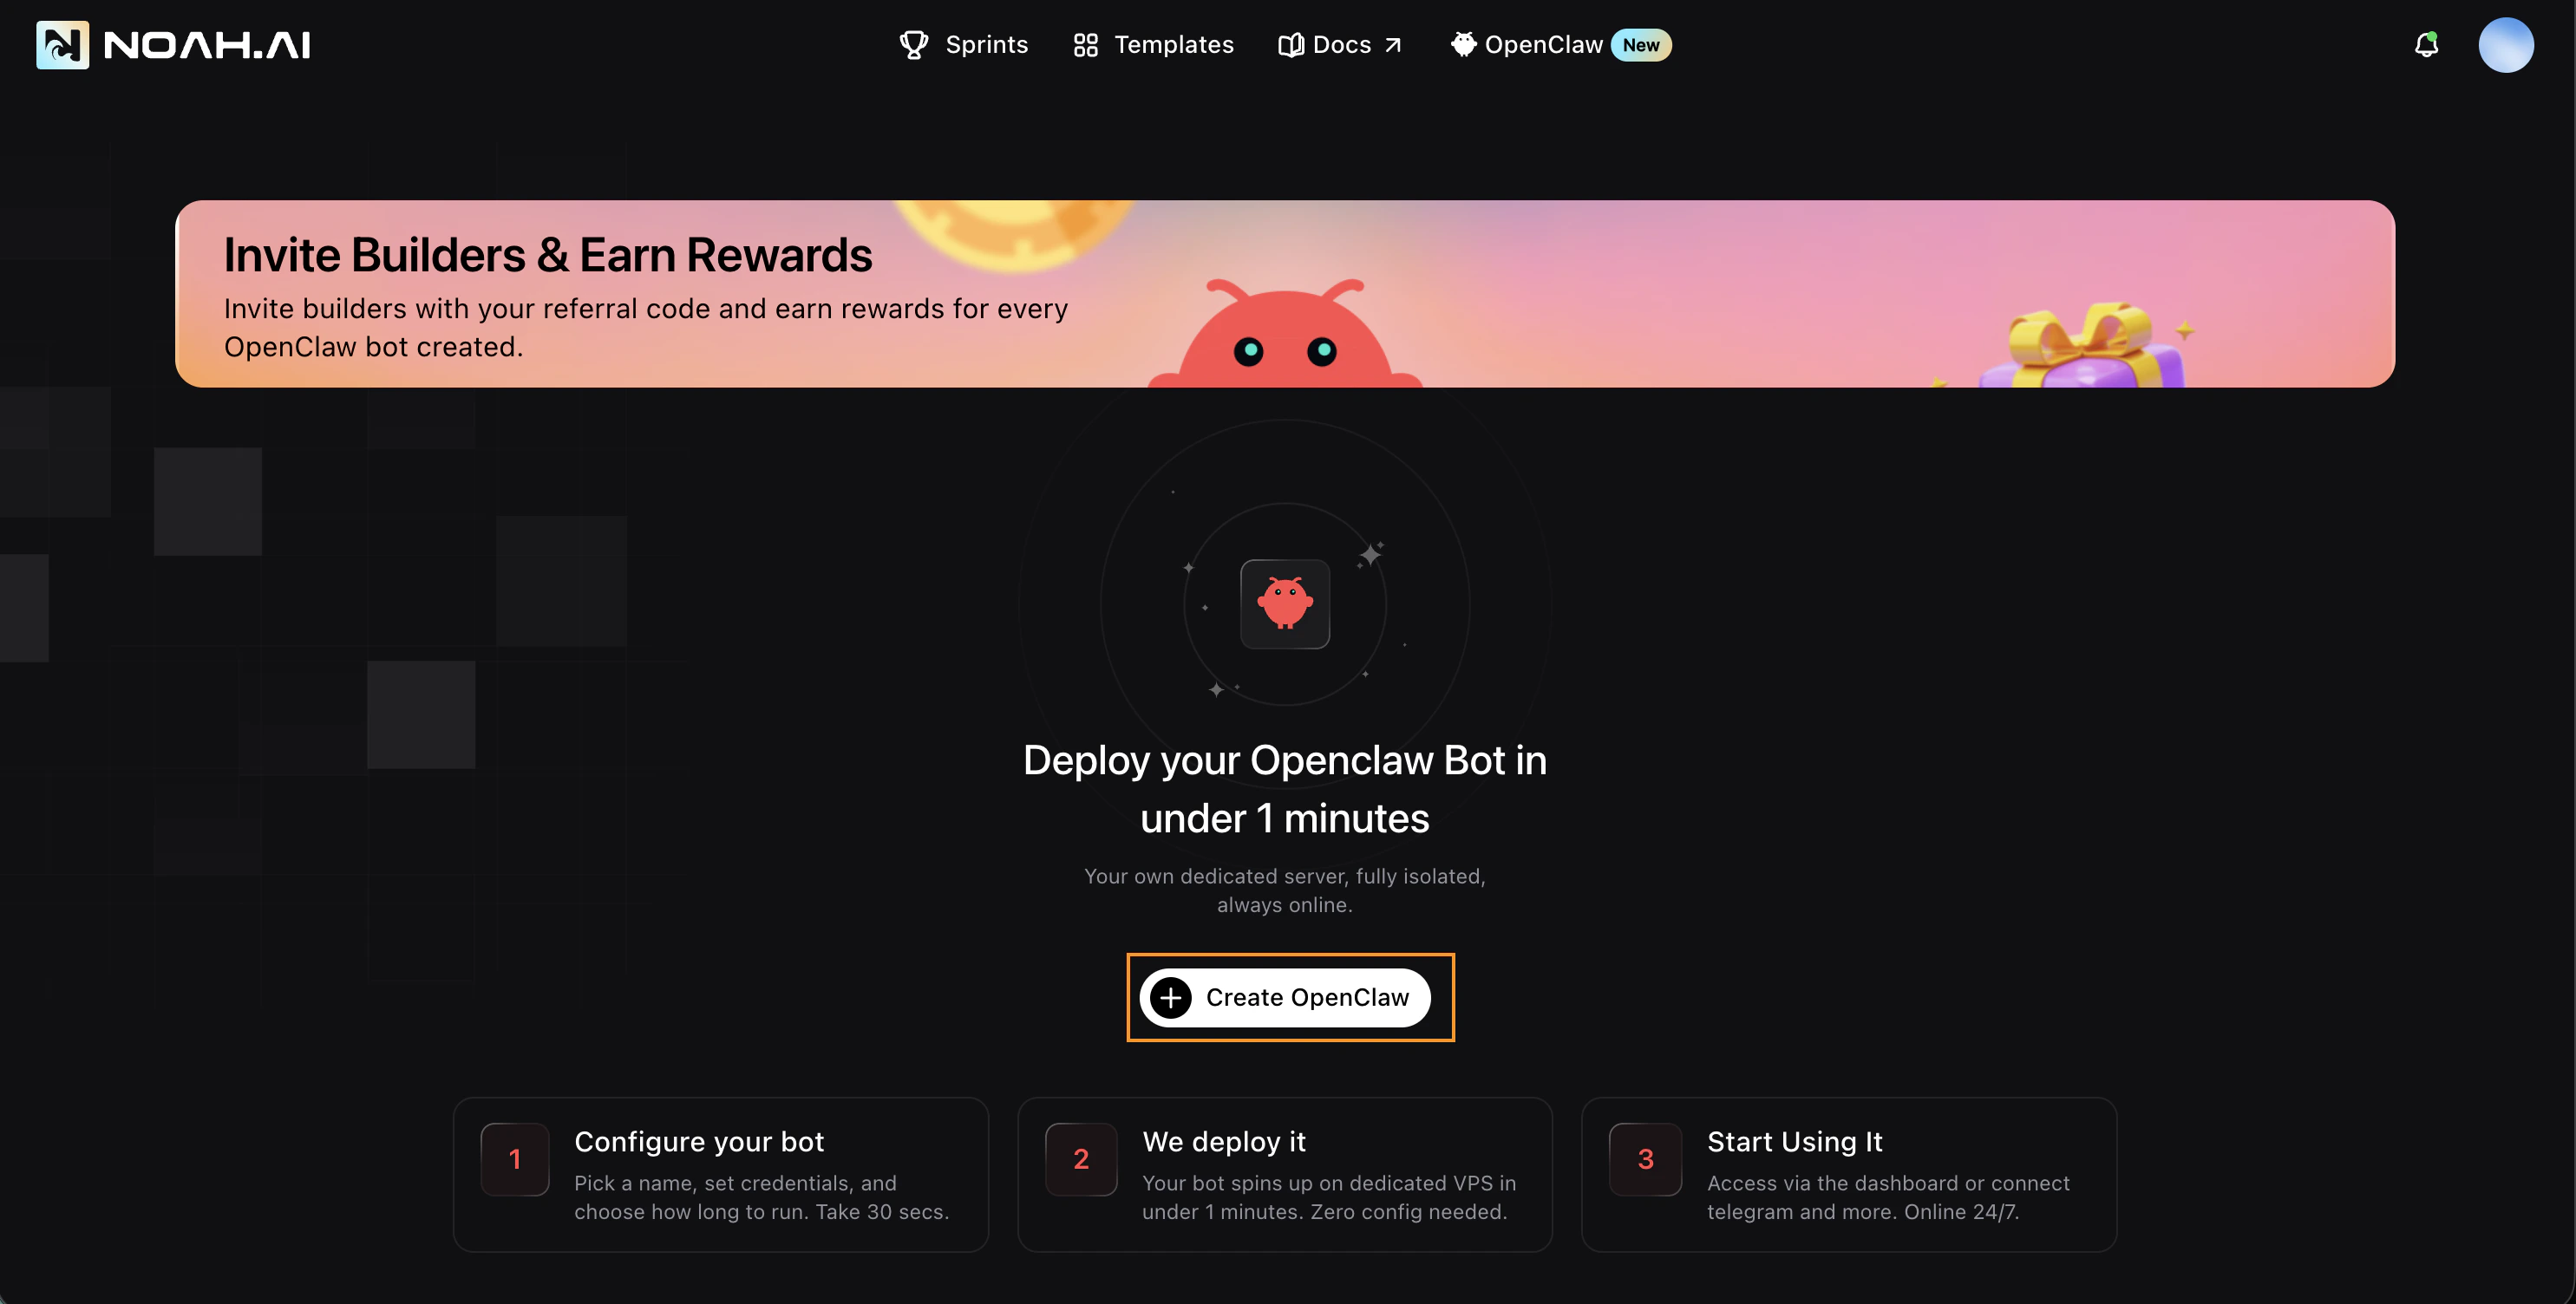
- Configure your bot — Pick a name, set credentials. Takes 30 seconds.
- We deploy it — Your bot spins up on a dedicated VPS in under 1 minute. Zero config needed.
- Start Using It — Access via the dashboard or connect Telegram and more. Online 24/7.
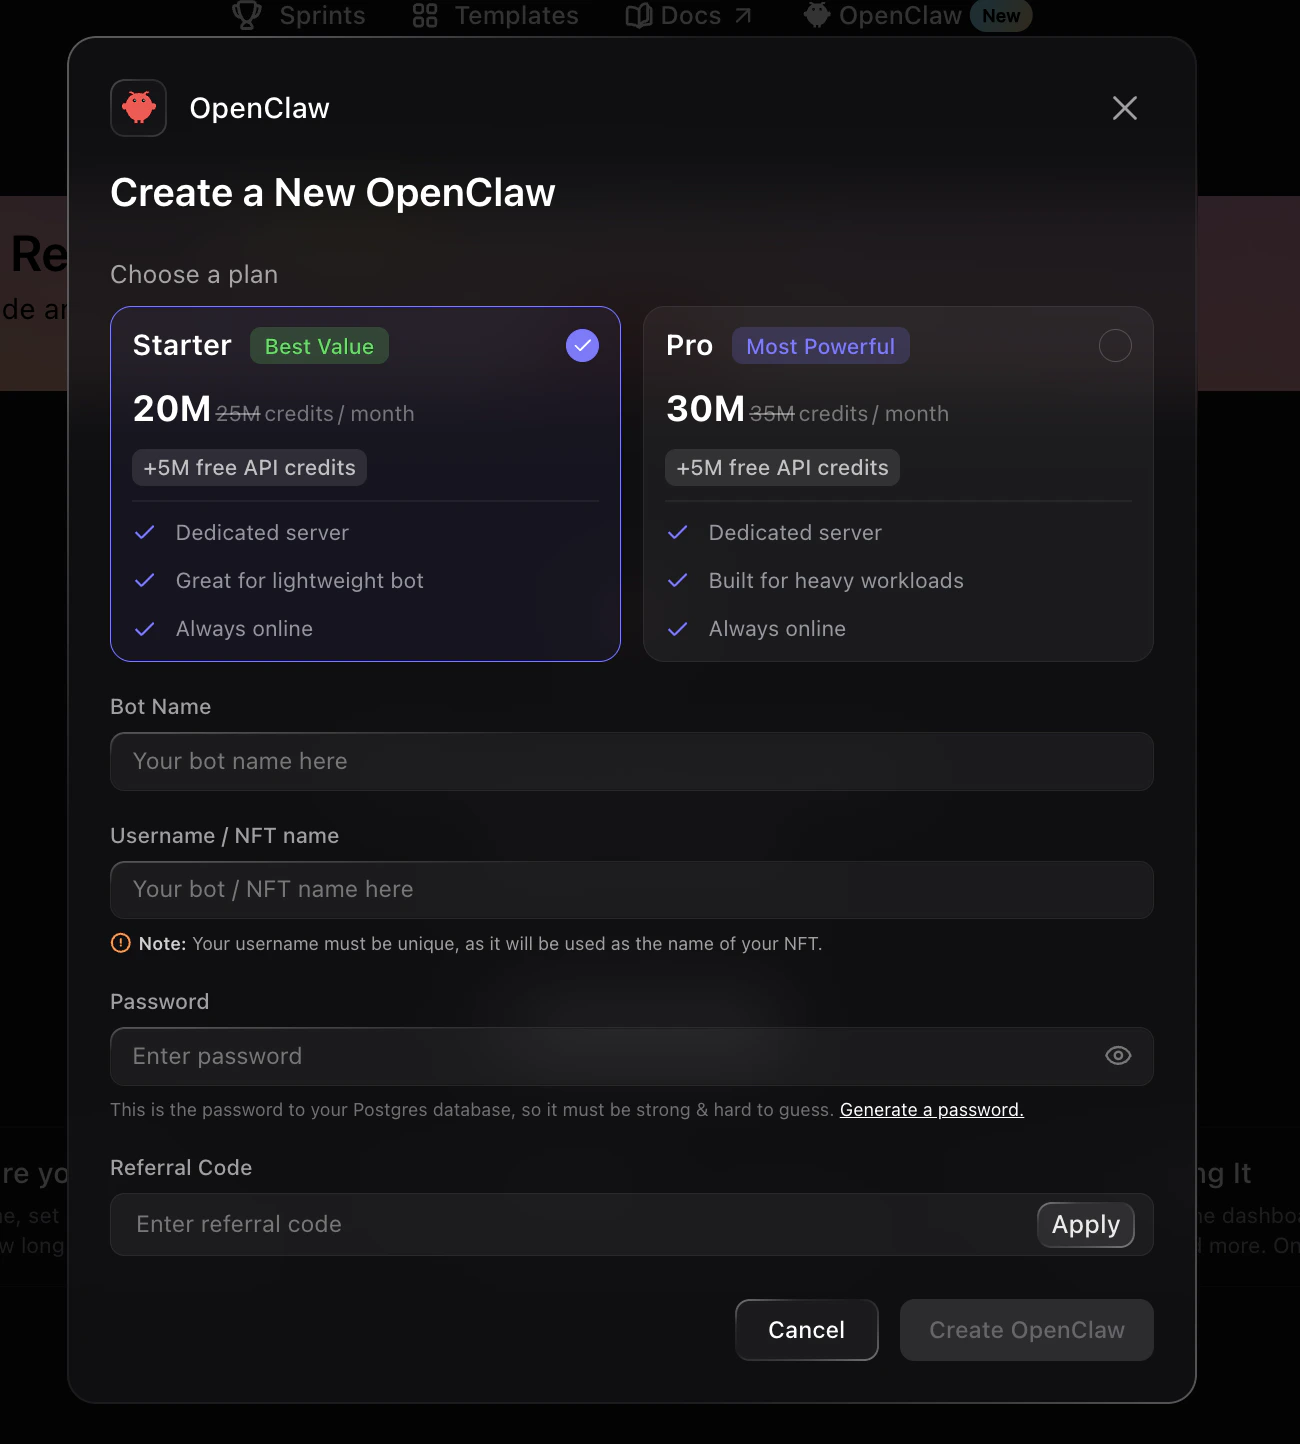
Step 2: Choose a Plan and Fill in Details
Click Create OpenClaw. A modal will open where you can select a plan and fill in your bot’s details. Choose a plan:- Starter (Best Value) — 20M credits/month, +5M free API credits, dedicated server, great for lightweight bots, always online
- Pro (Most Powerful) — 30M credits/month, +5M free API credits, dedicated server, built for heavy workloads, always online
- Bot Name — Give your bot a name
- Username / NFT Name — Choose a unique username. This will be used as the name of your Agent Identity NFT on Solana
- Password — Set a password for your Postgres database (make it strong)
- Referral Code — Optional referral code if you have one
Your username must be unique, as it will be used as the name of your NFT.
Step 3: Create Your Bot
Click Create OpenClaw to start the creation process. This takes approximately 2 minutes while your bot is being set up.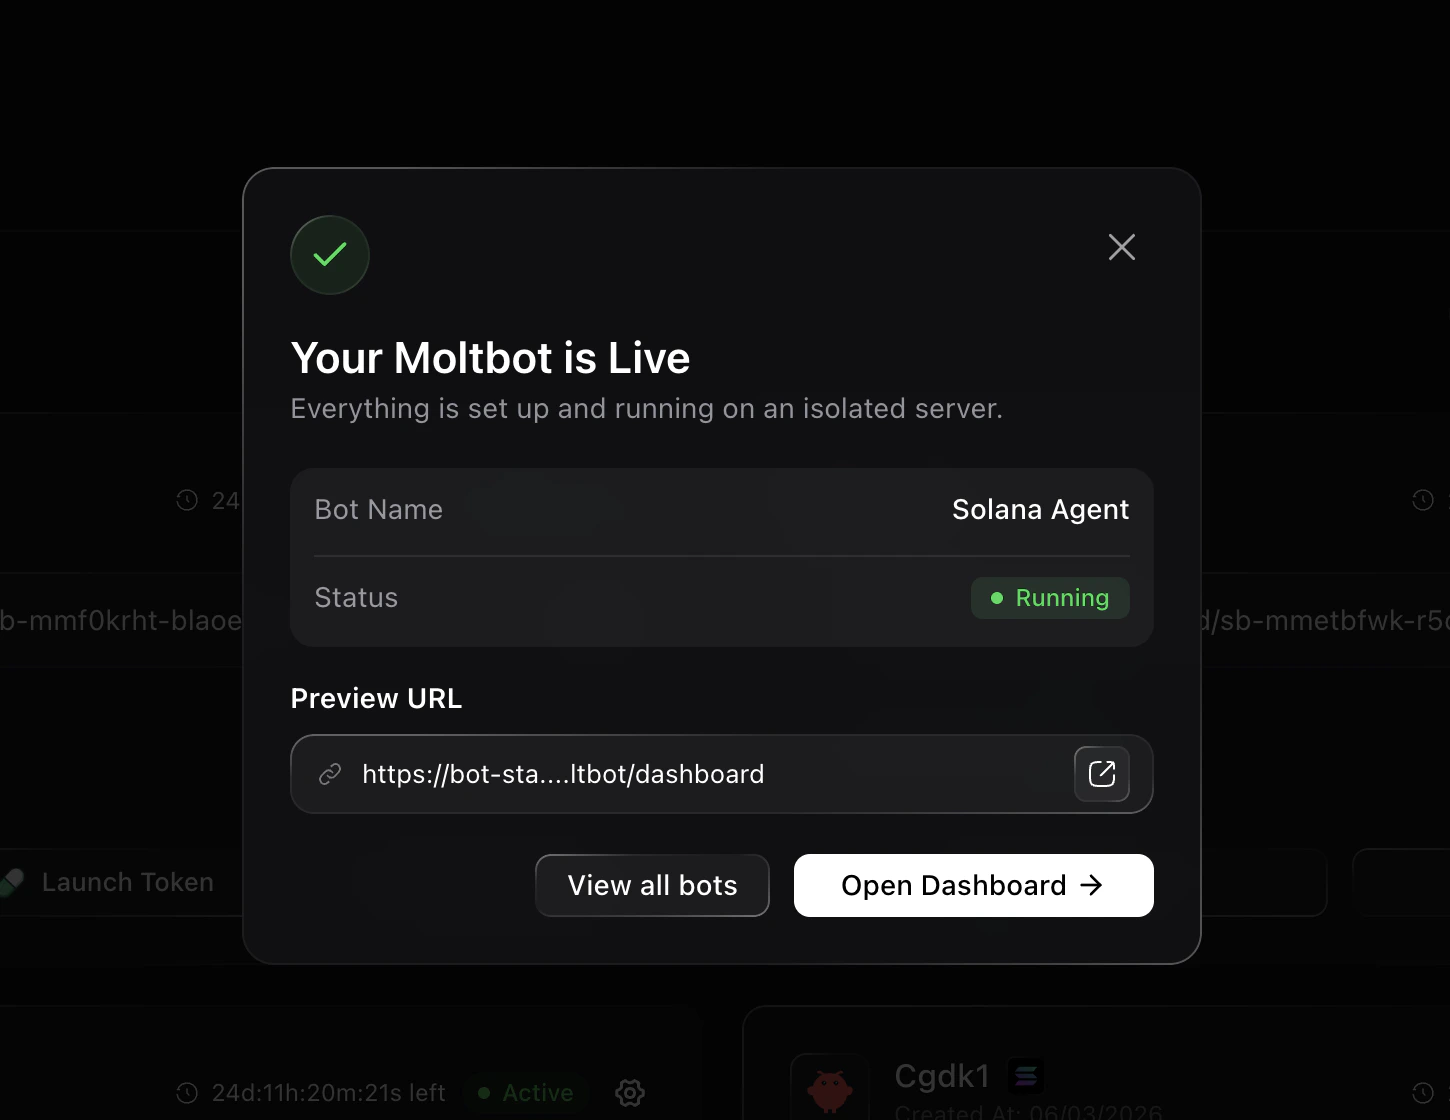
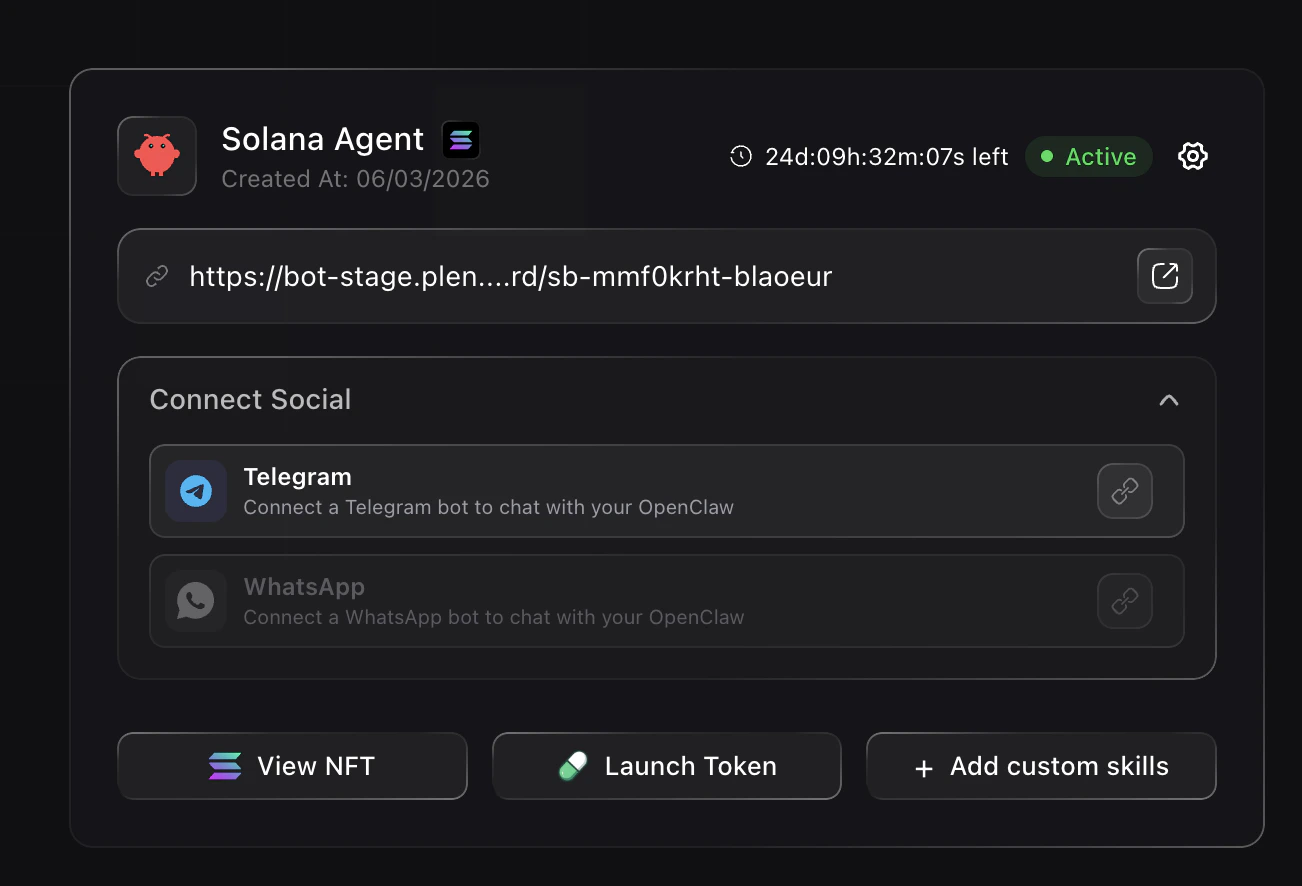
- View NFT — See your Agent Identity NFT on the Solana Agent Registry
- Launch Token — Launch a token for your bot on Pump.fun
- + Add custom skills — Give your bot on-chain and off-chain powers
- Connect Social — Link Telegram, WhatsApp, and other accounts
Your Agent Identity NFT
When your bot is created, a unique Agent Identity NFT is minted on the Solana Agent Registry. Click View NFT on your dashboard to see it. This NFT represents your bot’s on-chain identity, with the name you chose as the username.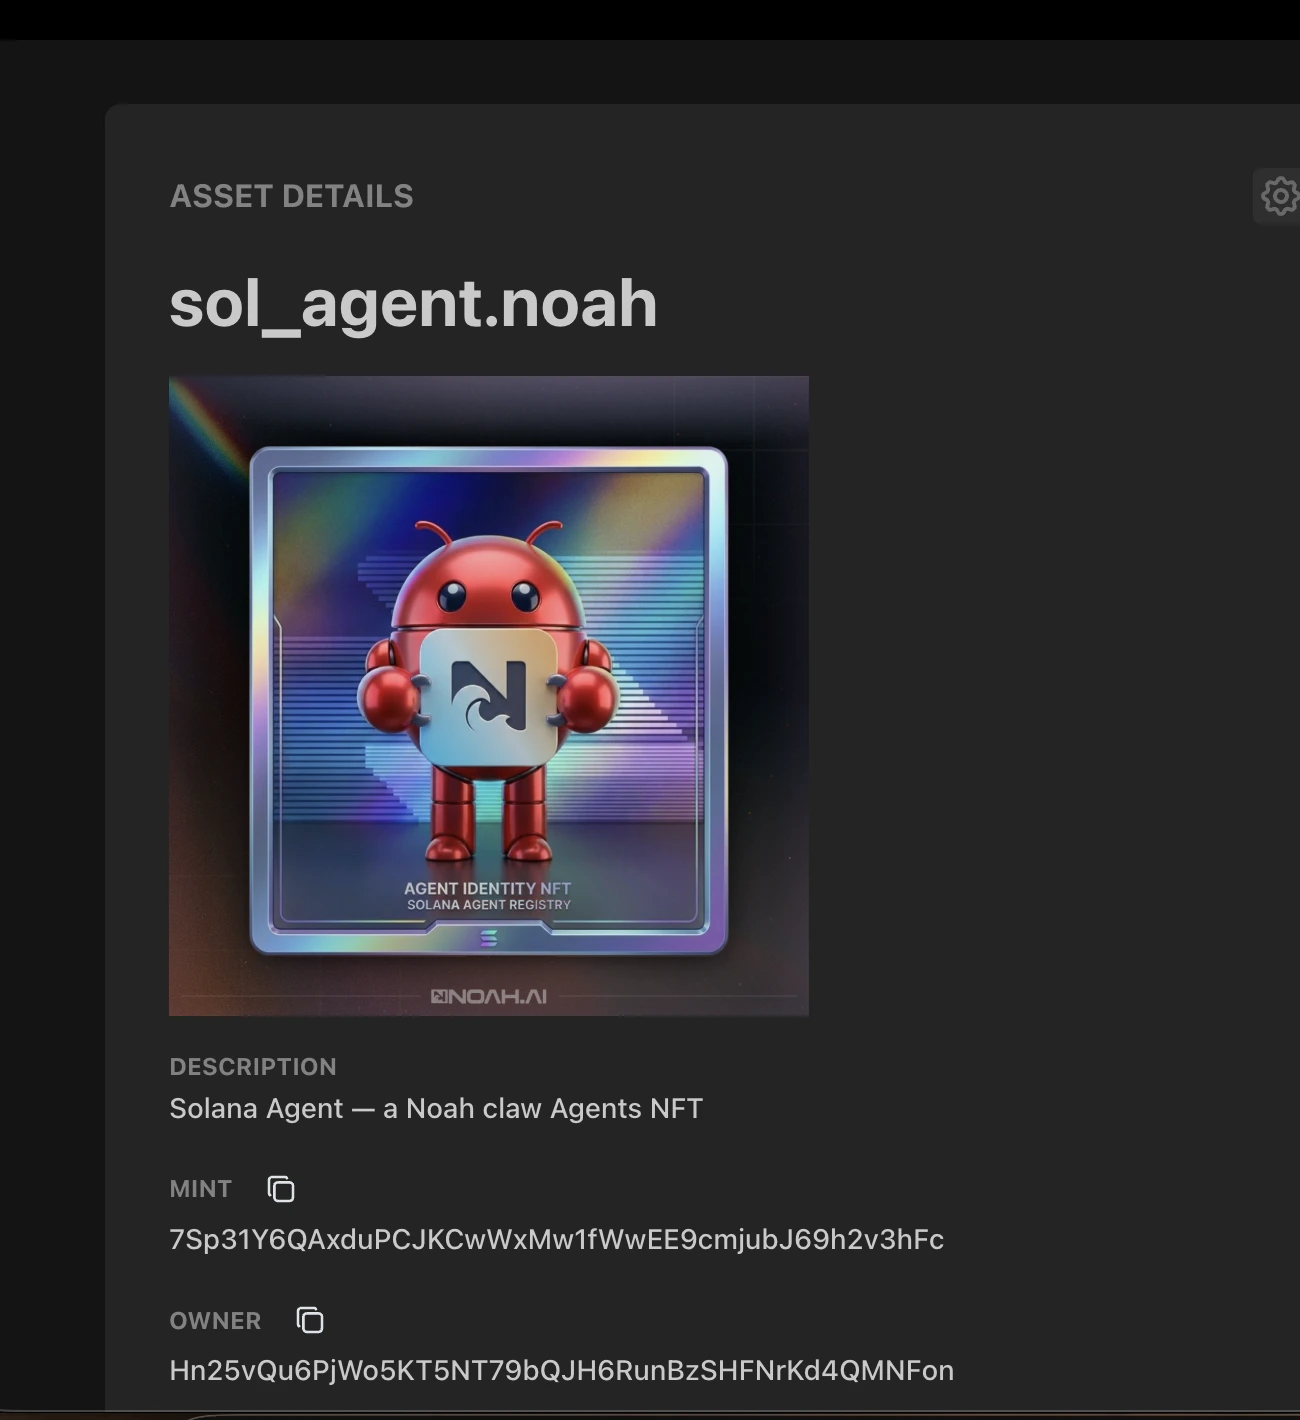
Add Credits
Fund your bot to start executing
Connect Socials
Link Telegram, WhatsApp, etc.
Add Skills
Give your bot real capabilities
Launch a Token
Create a self-funding revenue loop